
Today we will cover creating RESTful Web Services with WebDev v21. Its is very easy to create SOAP (WDSL) style Web Services with WebDev, but creating RESTful (HTTP GET) style services is a bit more difficult.
The good news is v22 will include the ability to create RESTful Web Services, the same way that we can currently create SOAP services. But what if you can’t wait until next year? You can create RESTful Web Services with a few tricks in v21.
We are going to create a simple web service that retrieves the current price of a product from windev-us.com. Let’s start by create a SOAP / WSDL style web service.
Creating a SOAP web service
First I create a new configuration in my project. As you have seen in a few of my past services, I use multiple configurations to create windows, web, web services, windows services, etc. all from the same project. But that’s a topic for another webinar.

Next we need to create a structure that will be used to return the result to the service.
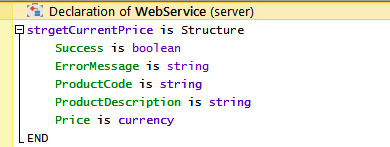
I generally include a Success Boolean, as this makes it easy for the programmer using the service to create logic to handle errors, and of course an actual error message. Then the fields that I am actually returning. You can get just about as fancy as you need to with this. You could define a structure called ResultSet and then include that structure inside each of your other structures you are returning. You can include arrays (Order and Order detail for instance).
Next we need to create a Set of procedures for the web service, this will be the “visible” interface for the web service and what the WSDL is built from.


Now we create a procedure, that will be come a web service call.
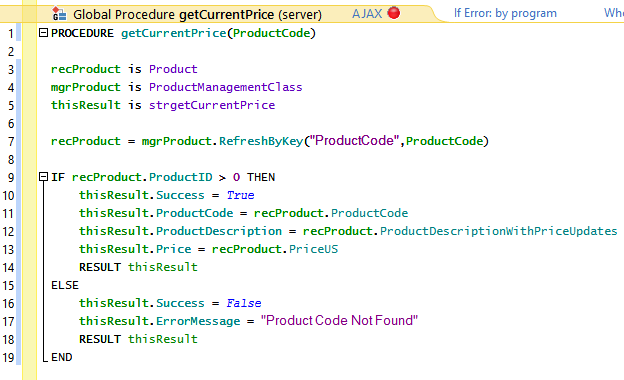
This procedure is pretty straight forward. I am using Andy’s File Manager class, but you could just as easily do this with Hxxxxx commands.
If the Product Code is found, Success is set to True and we return the product information, otherwise success is set to false and an error message is included.
We are done created the web service!!! Before we publish it, we should test it. How we like to test web services is by creating a test procedure that calls the “web service” procedure. So I am going to create another Set of Procedures and add a procedure to make a call to getCurrentPrice and display the results.
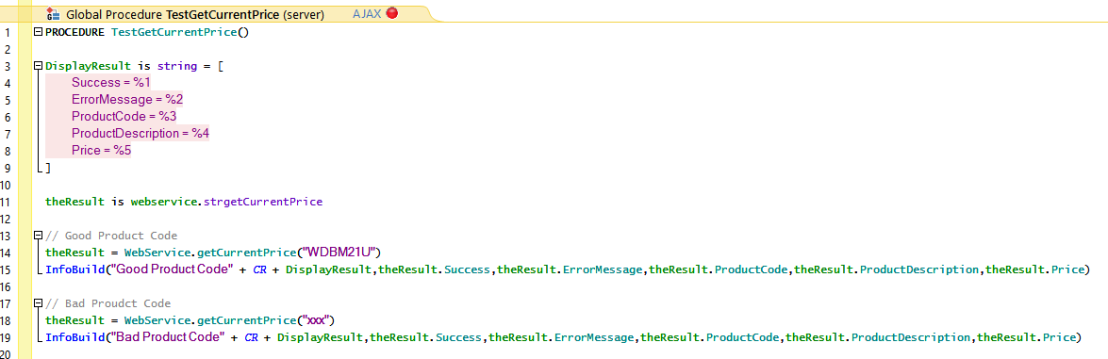
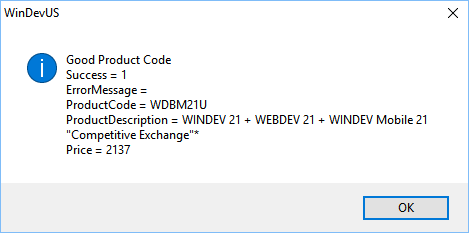
If we run the test procedure we see this for the call with a Good Product Code
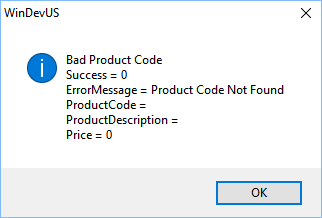
And this for the call with a Bad Product Code.
Please note the irony that our test procedure has as many lines of code as our web service!!
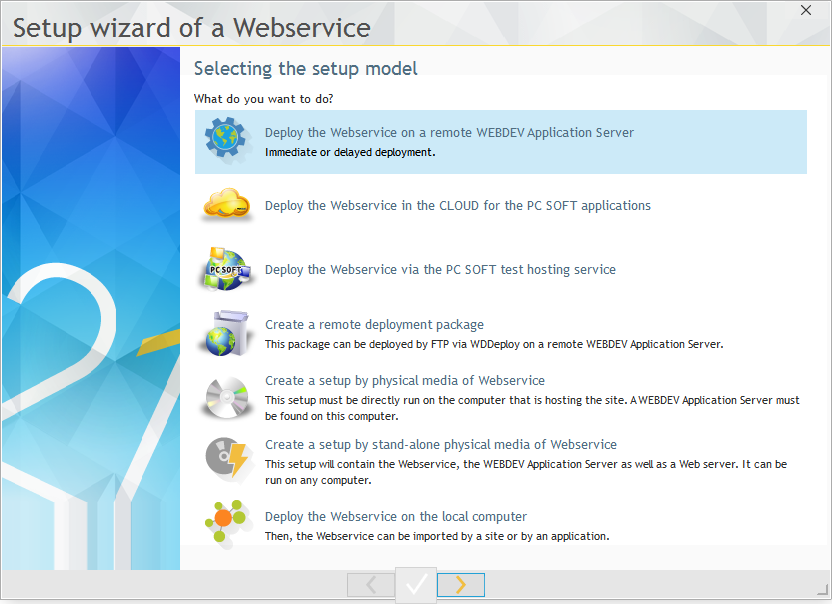
So all that is left is to publish the web service. This is similar to publishing a web site but there are a few differences. Start by pressing the “Generate Web Service” button

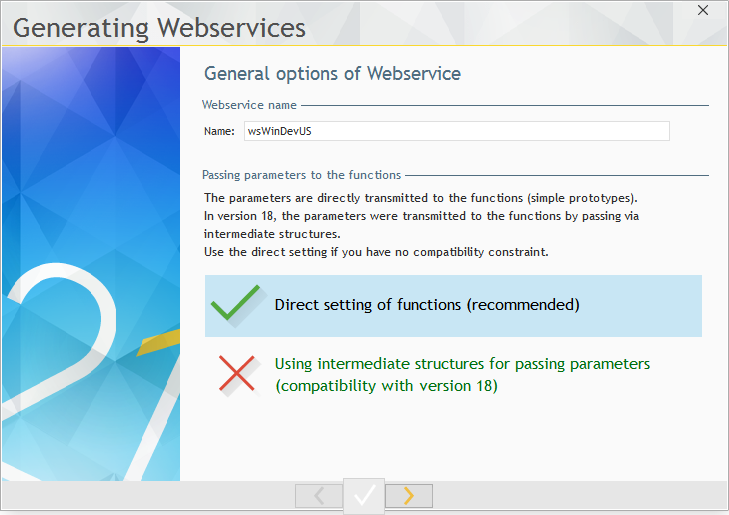
The first screen of the wizard, ask for the name of the web service and the method used for parameters, unless you have a specific reason, the “Direct setting of functions” option is what you should use.
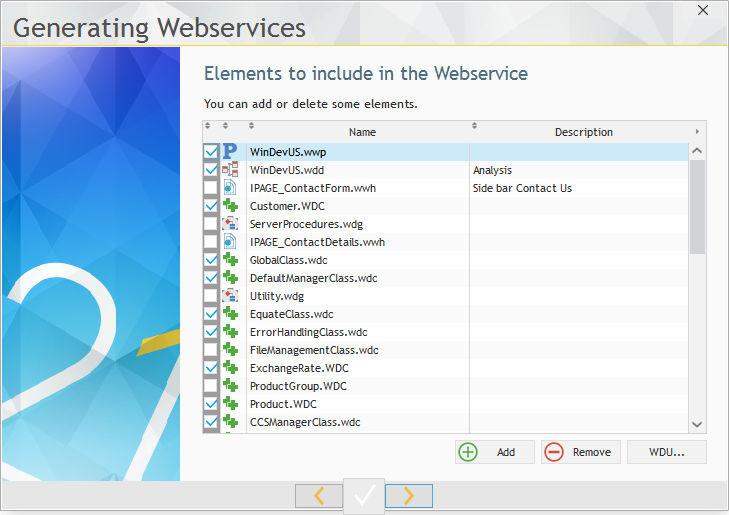
The next screen is the same as when publishing a site and the correct elements should be chosen by default.
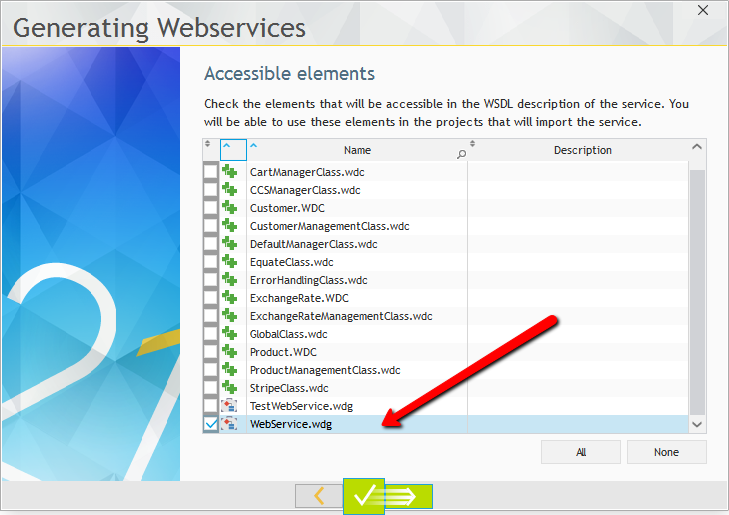
The next screen is where the “magic” happens. This is the accessible elements, which means that these are the elements that will be exposed via the web service interface. Which is why created a separate set of procedures for the web service so we can expose just those.
Other than terminology the next screen is similar to what you see when publishing a web site.
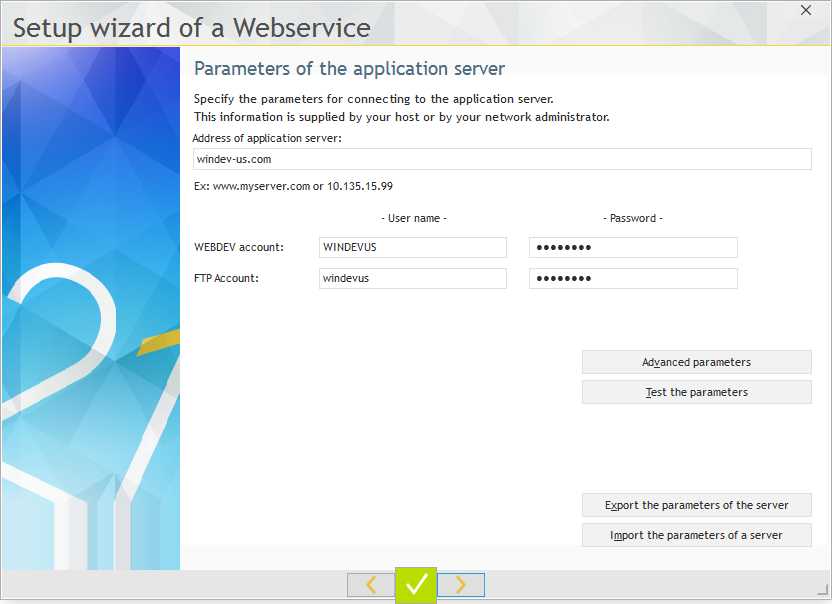
Since I am publishing the web service to the same URL as the site, my publishing settings are the same. Side Note: It sure would be nice if pcSoft would give us a way to get to the “Export the parameters” button without going through the entire publishing wizard!
Next is another screen that is similar to publishing a web site, with just some terminology changes.
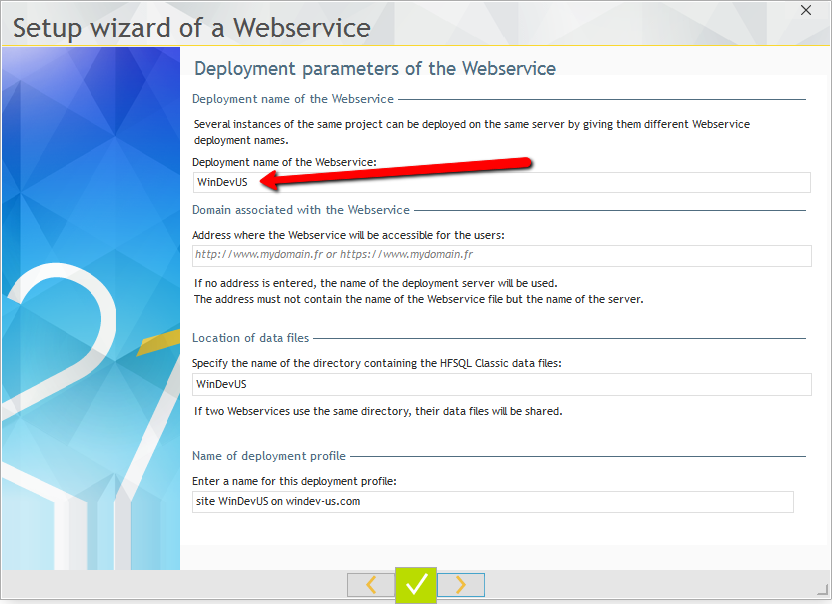
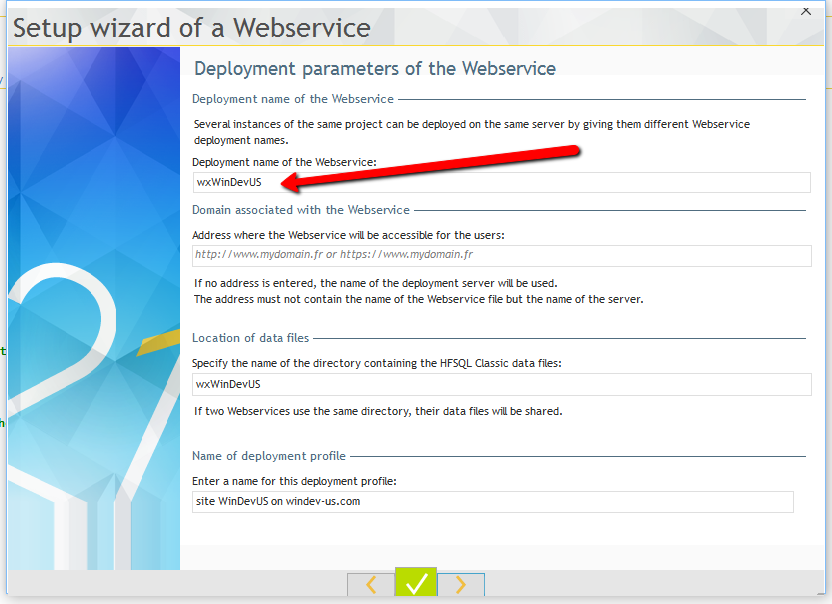
But one important tip, notice by default the Deployment name of the web service is the same as my web site, that is because they use the name of the project to generate the default deployment name. If you are publishing a web service and a web site to the same URL. Give the Web Service a different name, this prevents some issues with the short cuts created in your virtual host entries when publishing.
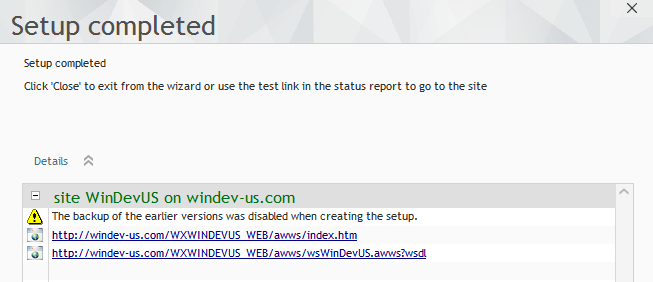
The rest of the screens are the same as those when publishing a web site, so I won’t include them here. When the service is published, you get two URL, one for the WSDL and one for a test page for the service. Keep track of URLs as you will need the WSDL once when you add the web service to another project.
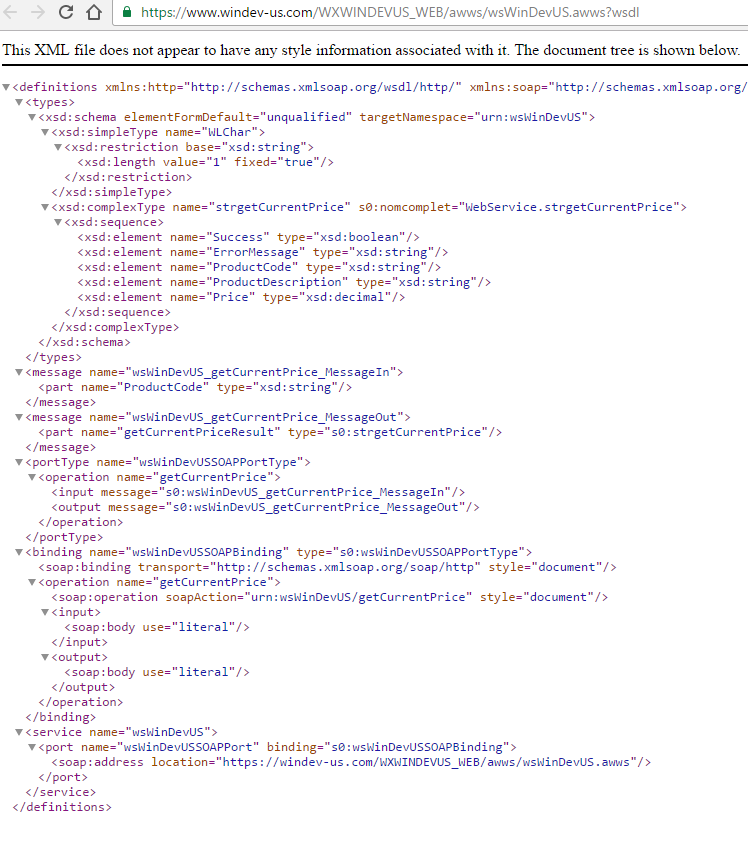
The WSDL URL will show us the actual WSDL, which is really just an XML file. Technically that URL is all you need to give someone, in order for them to use your web service. But for the LOVE OF PETE, please also include some real documentation. Let’s just say not all web service providers feel they need to!
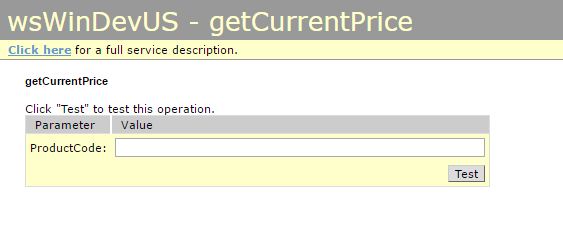
The test URL shows you a page with links for all of your exposed procedures, which of course we only have one currently. Note if you use complex parameters, like structures as parameters, there won’t be a link as there is no way to enter the structure for testing.

Clicking on the link gives us a test page with prompts for the parameters of the procedure
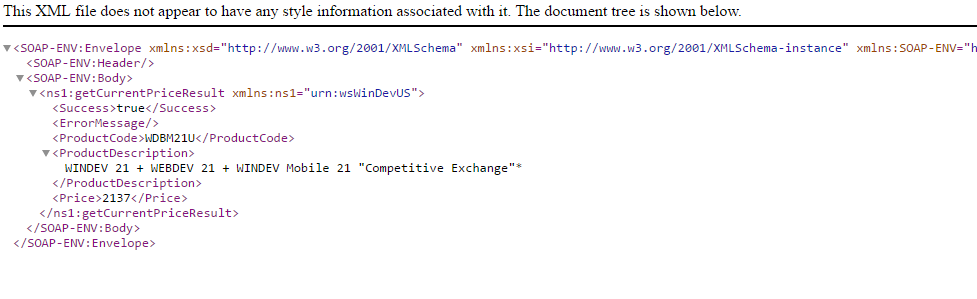
Putting in product code and pressing “Test” returns the SOAP response from the web service, which again is just an XML file.
So our SOAP web service has been created and published. Let’s create a simple project to use it, then we will get into the RESTful web service. I created a simple WinDev project, there is no analysis since we are getting “our data” from the web service.
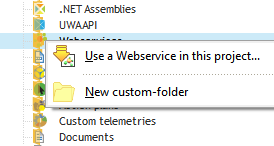
We need to add our Web Service to the project. I am sure there are other places in the IDE to do it but I use the Project Explorer and right click on Web Services.
Remember I said you would need that WSDL URL, well now you see why. A note concerning securing web services, you may notice on this screen there is a prompt for user name and password, if you configure you Web Server so the directory of the Web Service require an authenticated user, then the User and Password would go here. Most web services these days don’t use this method and instead use some form of an API Key, Token etc. that is include as a parameter of the call. Perhaps in a future webinar we can discuss the different options for securing your web service, but for this example, I don’t care who request the price for one of our products!

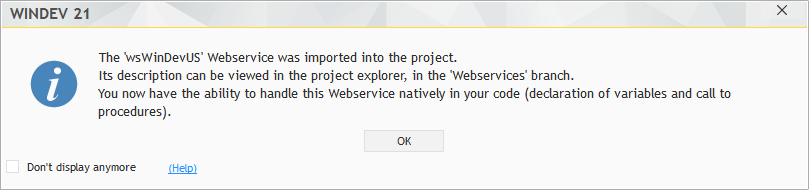
If everything worked right you will get a message similar to this
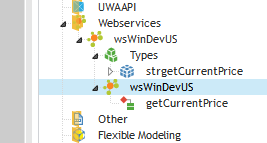
And we can also see the web service types, and procedures in the project explorer now.
So now all we need to do is code a call to the web service.

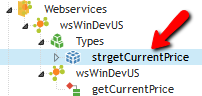
Very similar to our testing code we created. Line 9 and 10 are the actual web service call. We need to declare a result variable. The nice thing is we don’t need to know the structure as it is included in the web service we imported, in fact I just dragged the type into the code screen to get help declaring the variable.

Running our test app and entering a product code, then pressing the SOAP button gives use the following
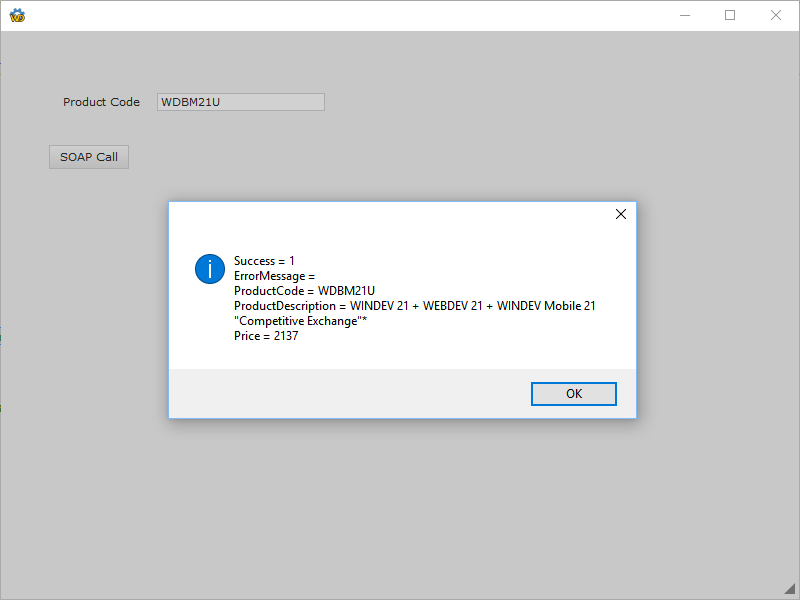
We have now successfully created a SOAP web service, and then consumed it in another project. Congratulations, pcSoft definitely makes it easy on us don’t they! A few housekeeping notes, just that might answer a few questions. The SOAP web service can be created in WinDev or WebDev, however you do have to have a WAS (Web Application Server) license to deploy it to a server, or host with wxPerts <G>
Creating a RESTful web service
So finally we come to the part of the article that you actually came for! First let’s talk about why you would want to create a RESTful web service, in the first place. To over simply it, RESTful web services are really just web pages that accept parameters and then result is XML or JSON data without any page formatting etc.
SOAP web services are nice because they are some what “self documenting”, but not all development environments include the framework for using them without you doing all the plumbing code yourself. Meanwhile since RESTful web service are just “web pages”, anything that can make an HTTP Post can consume a RESTful web service, heck you can even access them from JavaScript code!
I won’t fuel the fire of the SOAP versus RESTful wars, beyond saying that at one time it seems that RESTful was on the say out and SOAP was going to be the “new” standard. But recently the tide has seemed to shift and I have seen a couple of the larger web services I use, beginning to phase out their SOAP services. My theory as to why this is, is that they created SOAP services originally, likely because they were a .Net shop, but as they got popular they got a lot of pressure to provide RESTful services so more developers could access them, and now it has become a burden to support and maintain both. Since any development environment that can use SOAP can also use RESTful, but not every environment that can use RESTful, can use SOAP, at least not without a lot of extra work, RESTful becomes the “least common denominator”.
As mention v22 will be providing us the ability to create RESTful services, similar to how we create SOAP services, in fact I am hoping that we will be able to create both from the same code, which would keep us from having to worry about the SOAP versus RESTful wars! But for now we have to use a few tricks to create a RESTful web service. So lets go back to WebDev.
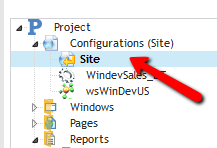
Remember I said RESTful services are really just web pages, so I don’t need a new configuration, I just switch over to my web site configuration.
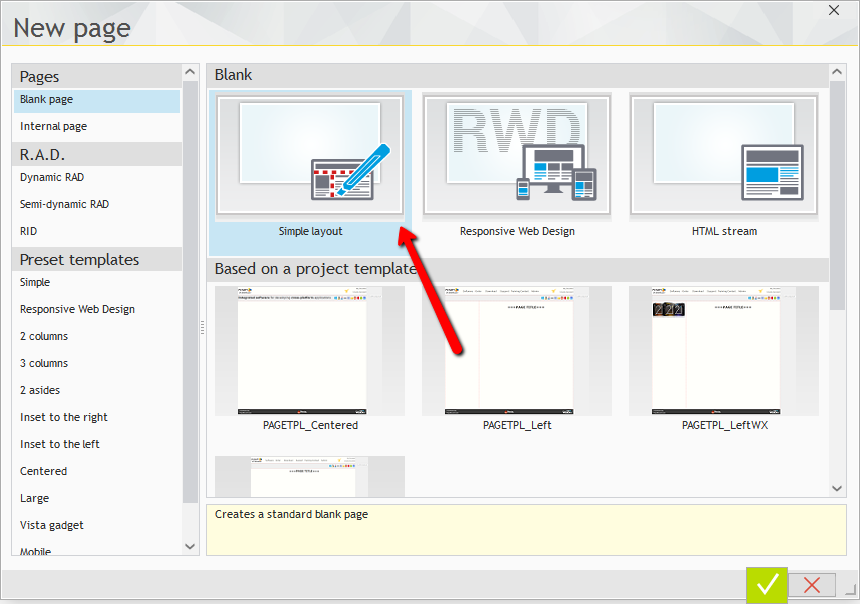
And then create a page, but remember I said they are pages with out any formatting elements, etc. How do we do that, well I start by create a page using Simple Layout, since the layout doesn’t really matter anyway.
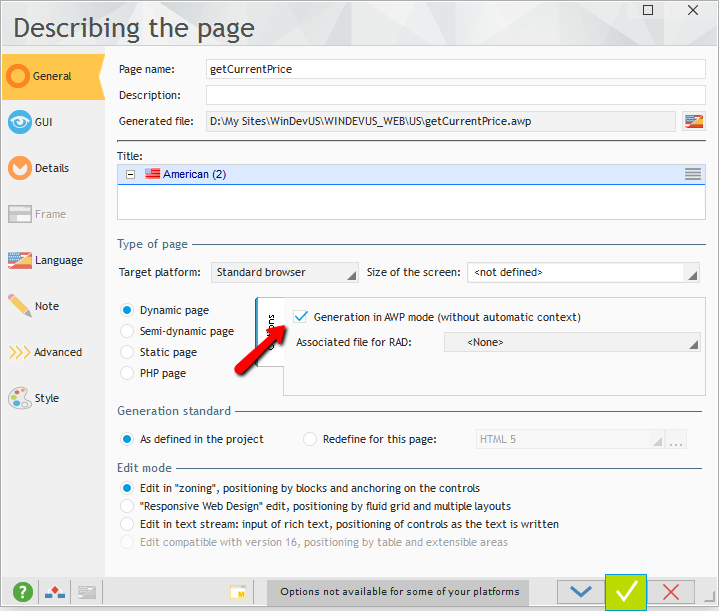
We name the page getCurrentPrice as this will be part of the URL can provide some “self documenting”
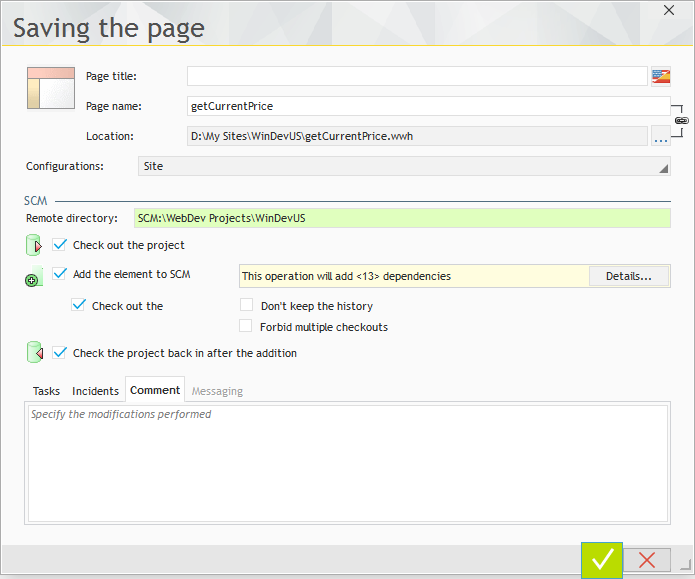
Next we need to make this an AWP page so it can be call directly. Since web service calls are by definition “connection-less” sessions, we don’t have to worry about managing contexts like we would if we were developing an AWP web application.
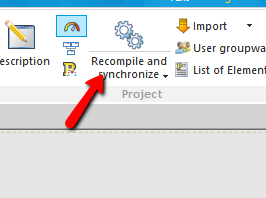
Now comes the real magic, but first you have to understand how WebDev puts together you pages. There are two parts the HTML page, and the AWP page. The HTML page includes place holder tokens that are replaced when the AWP page executes. First thing we need to do is get our page generated, so Press the Recompile button.
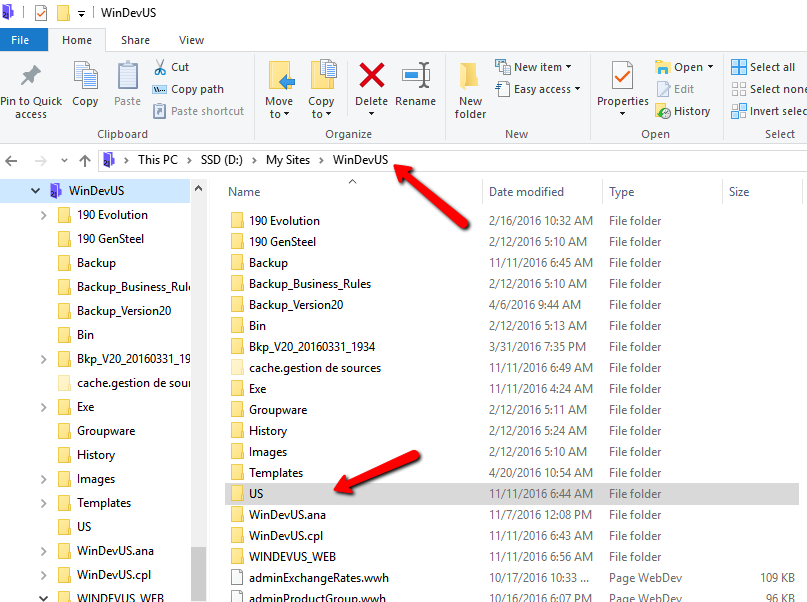
The HTML pages (.HTM) are under your project folder in a folder for the language, US in our case. Don’t get confused this is not the US folder that is under you _WEB folder.
Now go into the Page Description and on the Advanced tab, check the box that says “Don’t generate the HTML file anymore”
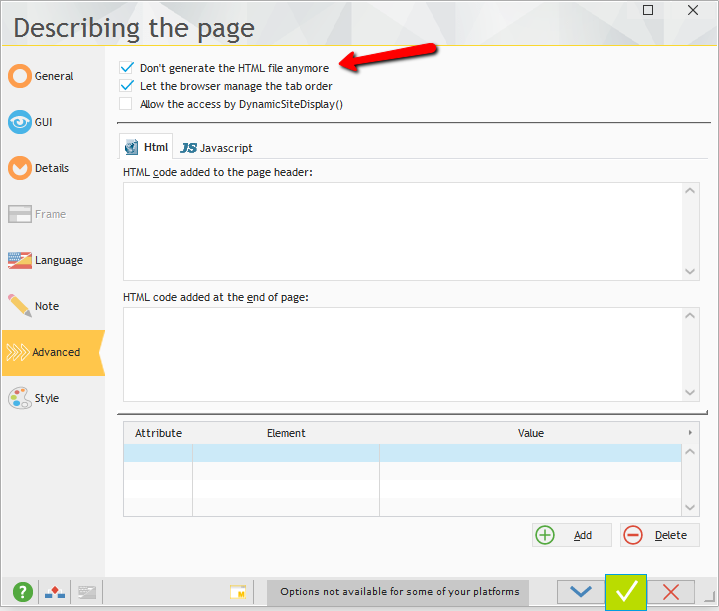
This will let us edit the HTML file without worrying about WebDev overwriting it. Now open getCurrentPrice.htm that we located earlier. Initially it will look like this
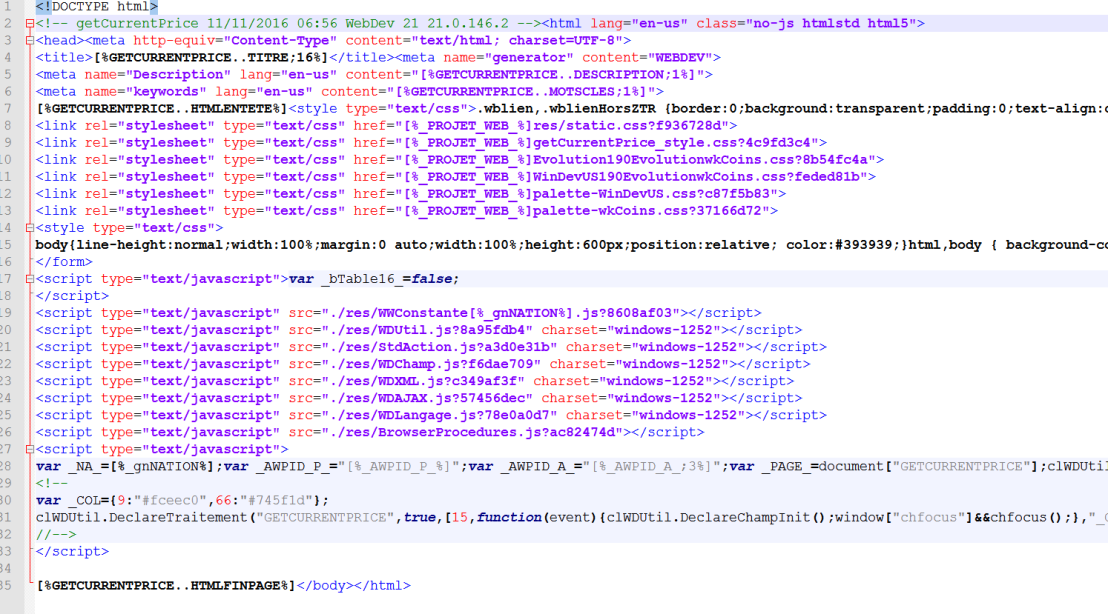
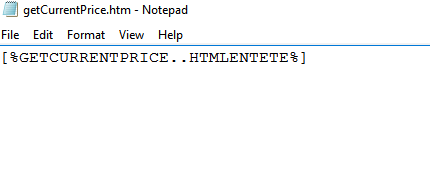
You can see the [% place holder that the AWP page replaces. Now we want to remove everything except [%GETCURRENTPRICE..HTMLENTETE%] which is the MyPage..HtmlHeader property. So now the HTML file looks like this.
Now in the Global Declaration section of our page we put the following code.
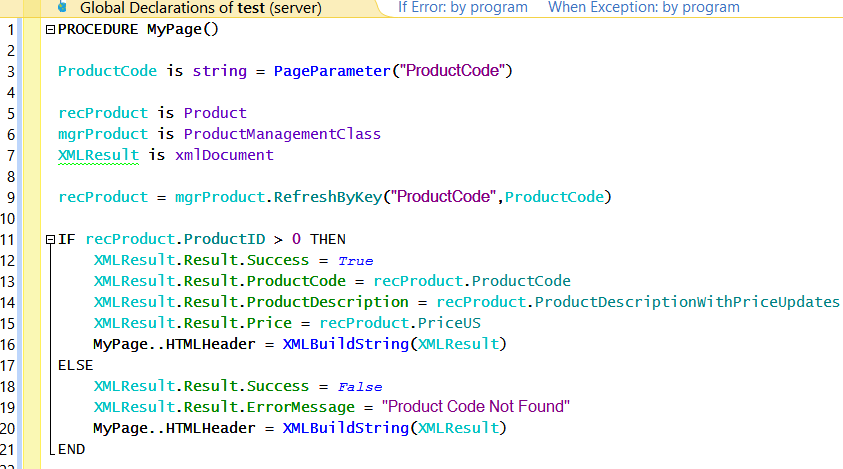
As you can see most of this code is the same as what we did for the SOAP service. The differences are:
Line 3 – this get the URL parameter named ProductCode when someone calls the RESTful webservice they will use this format: http://windev-us.com/US/getCurrentPrice.awp?ProductCode=WDBM21U This is the standard method of passing parameters to a RESTful service.
Next our result is now defined as an XMLDocument, instead of a structure. pcSoft makes it very easy for us to work with XML. as you can see, all I have to do is use the “dot” syntax to create XML attributes in my XML document. Note: I am doing a “Nested” XML, I am doing Result.Varaible. This is so we get a “root” node, which is required for property XML.
The only other difference is instead of doing a return we are setting MyPage..HtmlHeader to the XML result, instead of doing a return. Note: XMLStringBuild turns our XML document into an XML formatted string.
If we make the call above and view the source of the resulting page we will see this:

Which is what someone calling a RESTful service would expect to see.
Nothing special to cover about deploying the RESTful service remember it really is just a “Page” of your site so publishing the site publishes the RESTful service as well.
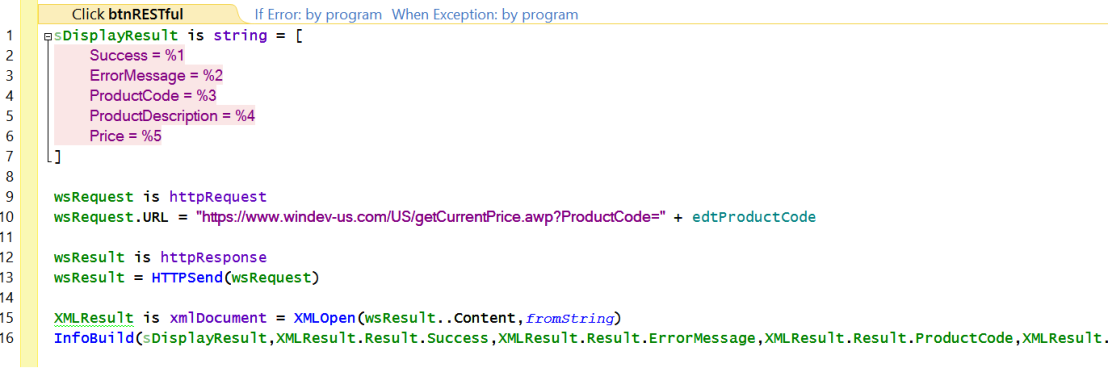
To call the RESTful web service from our WinDev program, we use the HTTPRequest functions. We declare the URL with the ProductCode parameter as discussed above, the Content Property of the HTTPResponse contains our XML, which we use the XMLOpen function to get into an XMLDocument, then we can display the info the same as we did via the SOAP call.
Bonus Time – JSON Content
I should mention that although I am seeing more and more RESTful services offering XML output, JSON is still the standard output from most RESTful services. JSON is more of a JavaScript data standard and is more likely to be build into most development enviroments, in fact most browsers have JSON functions build into them for browser side handling of data.
The really nice RESTful web services give you the option to get the result in either format. So lets go ahead and add that capability to our web service.
We change the code of our page to the below.
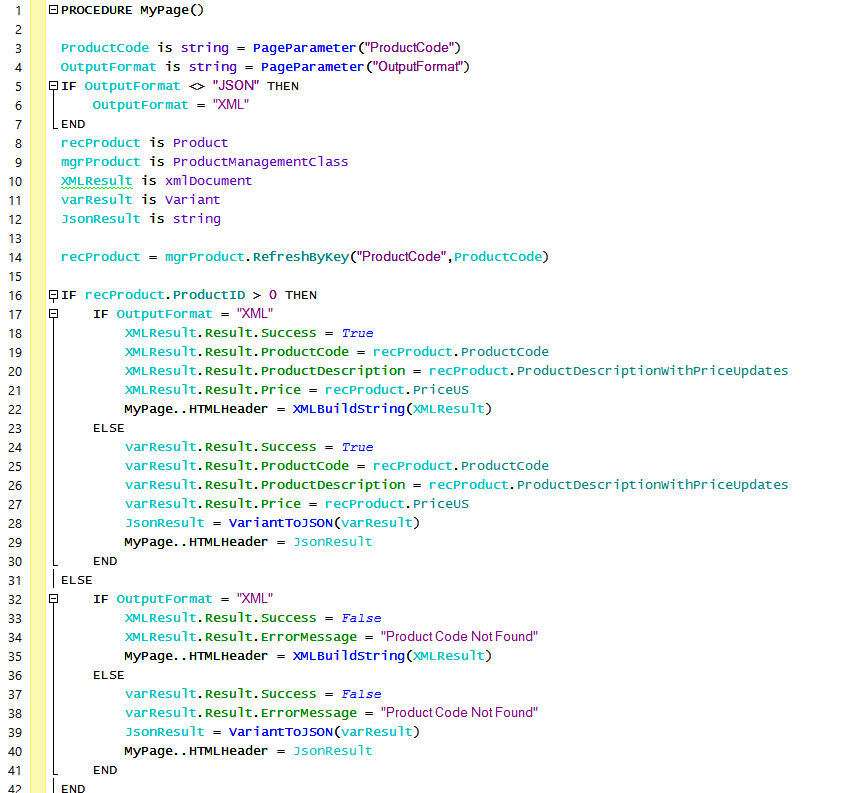
We have added a second parameter “OutputFormat”, so now the URL for the call would look like: https://www.windev-us.com/US/getCurrentPrice.awp?ProductCode=WDBM21U&OutputFormat=JSON. Note: the second parameter is prefixed with an & instead of ?
If the OutputFormat isn’t specified or is anything other than JSON then we default to XML.
We declare a Variant, and a string used for the JSON output. Line 24-27, are the same as 18-21, except instead of the XML variable we are using the Variant. Again the ability to use the “dot” syntax without having to declare a structure is really nice!
Line 28 uses the VarianttoJSON function to turn the variant into a JSON formatted string. And then line 29 sets the header to that result.
The result of our call looks like this:

To consume the service in the JSON format in our WinDev project our code looks like this

Very similar to the XML version, except our Content property now contains the JSON data, and we are using the JSONToVariant function to convert the JSON string back into a Variant so we can process it with the “dot” syntax.
Conclusion
That wraps up the article. If you missed it this is a companion to the webinar located on our YouTube channel

Hi, how can I generate the .wsdl file ?
LikeLike
When doing SOAP services, the WSDL file is generated as part of publishing. After you publish you will be given two links one to the WSDL and one to a Test interface page.
REST services do not have a WSDL.
LikeLike
So a simple REST service cannot be imported as a webservice in a WinDev application ?
LikeLike
No, the import of Webservices is all about SOAP. The REST standard doesn’t include any type of “definition” file. This is not a WinDev thing, just the nature of REST services.
For REST services you just “read the docs” and create calls to the functions you need to access, using the RESTSend Function
Take a look at these pages in the help for more details
https://doc.windev.com/?1000022792 (most of this page is about creating REST services but at the end there is a section on Calling a REST function by programming)
https://doc.windev.com/?1000021476 (the help page for the RESTSend function which includes another example of calling a REST service)
LikeLike