Andy has already done a video concerning the WAS install and update. And he touched on the issue with OS accounts, this blog article is my take on it along with the work around I have some up with. There may be a better way but this is what has worked for me so far. Hopefully PCSOFT can add some additional features to the upgrade or additional guidance, we have reached out to support and will let you know if they get back to us with any additional information.
The new WAS v25 wants to OS accounts one for publishing and one for running the site. It’s all part of the continuing improvements in the integration with IIS. The account to run the site, doesn’t make a lot of sense for us Apache users, but not a big deal we will let it create the accounts. Not the account for publishing is actually also what use to be the WAS user, the two are tied together, and are one in the same, which is what leads to all the confusion when upgrading.
The real issue is that all of this OS account create happens automatically when you create a new WAS users, but unfortunately the upgrade process is not creating OS accounts for the existing WAS users. And there doesn’t seem to be anyway in the WAS admin to trigger it to do so.
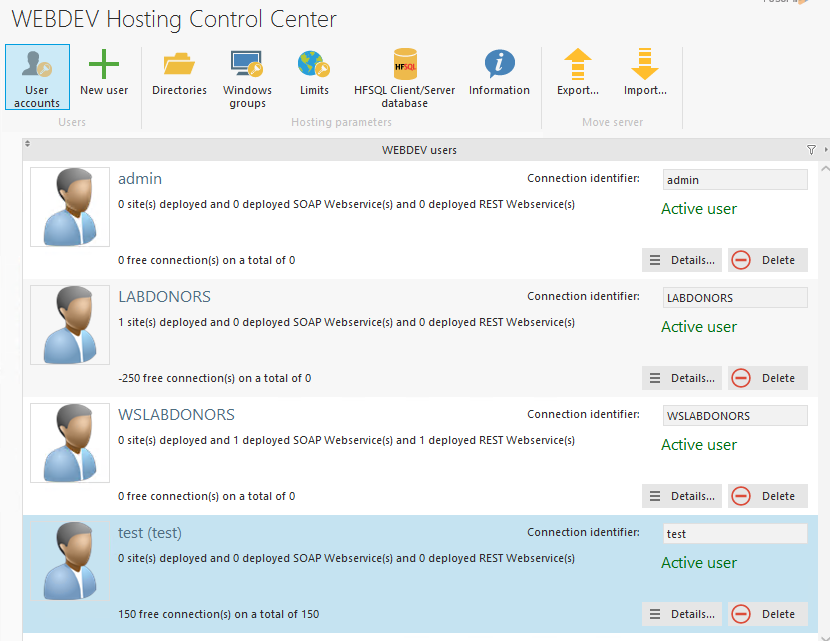
I have worked out the following work around. First run the WEBDEV administrator, and click edit accounts.

I have already gotten the LABDONORS user fixed up, so we are going to handle the WSLABDONORS user.

If you click on the Details button and go to the OS account tab you will see the issue, there is not OS account associated with the user, and not account for running the site. A button here to create the user would sure make this process easier. NOTE: If you try to publish the site, using the old username and password, you will be told there is not matching account, so we have no choice but to get the new windows OS accounts created.

As I mentioned this all works seamlessly with a new user, and in fact we are going to use that as a work around. Return by to the User Account list and click new user And you see as I mentioned it does create give us the ability to create the OS account when creating a new user.

We are going to use “test” as the user name, but the password we set to be the same as the WSLABDONORS password as this user is eventually going to be the OS account for that user.

Clicking next gives us the following screen and we can take the default which is both of these options not checked.

And the next window is creating the other OS account to run the site, notice it is the same user name prefixed with IUSR_ and has the same password. We can leave this alone as well.

Take the defaults on the next screen

On the next window make sure the directories are the correct directories for the existing account we are trying to fix (WSLABDONORS). Note Static Site is a new one, and I will be discussing that in future article, hint: it helps us get Apache setup correctly so we can use the publish without disconnecting the users option.

Just take the defaults for the next 2 windows


Which brings us to the final window, we could uncheck some of these options but if you did everything as I outlined, there is no need they won’t hurt anything.

After clicking finish, we see we now have a new WAS user test

Now we move over to windows user management and we can see our 2 new OS accounts test and IUSR_test. Right click and rename those accounts to WSLABDONORS and IUSR_WSLABDONORS. Note: Make sure you match the case perfectly with the original WAS user, if not you will end up with two WAS users in the next step, and a big mess. Don’t ask me how I know this 😉

Back over the the WAS User Management, click on details for the WSLABDONORS user, and go to the OS Account tab. Select our two OS accounts, we just created and renamed. Note: the publishing account should actually already be selected since it matches by name and click save.

You can now delete the test WAS user, make sure the only option selected is Delete WEBDEV user account.

If you held you lips just right through this entire process, you should now be able to publish an update to the site.

