
From version 26 onwards, adding Authenticator App support to a WEBDEV site has become effortless. Authenticator apps generate Time-Based One-Time Passwords (TOTPs), offering a more secure and convenient approach to Two-Factor Authentication (2FA) compared to email or text messages.
What is an Authenticator App and Why Should I Care?
Authenticator apps are applications that facilitate Two-Factor Authentication (2FA) by generating Time-Based One-Time Passwords (TOTP). This enables you to provide 2FA support without the user needing to wait for an email or text message containing the code. Once registered with your site, the Authenticator App will generate the code, which is refreshed every 30 seconds. Using Authenticator Apps instead of One-Time Passwords (OTP) via email or text offers many benefits in terms of both convenience and security.
TOTPs are based on industry standards, offering users the flexibility to select their preferred Authenticator app, including options like Google, Microsoft, Duo, Authy, BitWarden or LastPass. These apps function offline, are simple to configure, and provide increased security as the code is not sent via email or text.
I’m sold! How do I add it to my WEBDEV site?
I’m glad you asked. Starting with version 26, PCSOFT has made it incredibly easy to implement Authenticator App support. I assure you, this will be one of the simplest security enhancements you’ve ever made! It would be strange for me to write this article if that weren’t the case. 🙂
First, let’s see it in action on our wxSocial example site. We provide users with the option to enable it on their profile page.
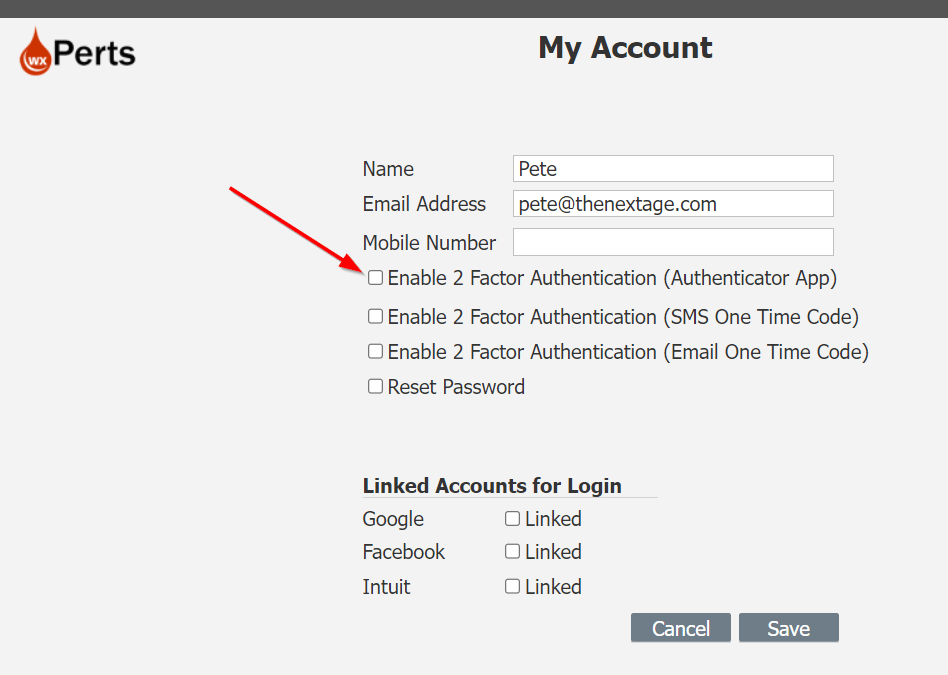
When users enable the option, they are presented with a QR code to scan with their Authenticator app to register our site. Please note that the TOTPkey is also displayed below the QR code, allowing users to manually enter it if they cannot scan the code.

Once the code is scanned in their Authenticator app, a display similar to this will appear. It reveals the name of the site and the account used, which is useful when managing multiple accounts on the same site. A 30-second countdown is also visible, indicating when the code will change.

Now, after validating their password, we request the TOTP code from the Authenticator app when they log in.

If the correct code is entered, they will be logged in. Remember, this is just a demo site, other than the account page there literally isn’t anything to “See Here” 🙂

The Code
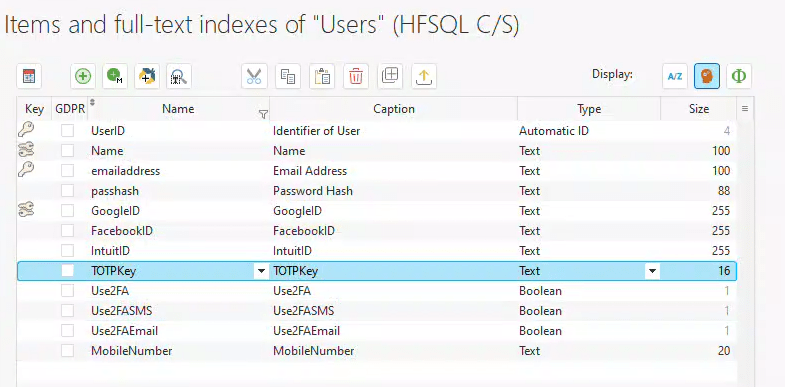
First, we require a 16-character string in our database table to store the TOTPKey. This key will be transmitted to the authenticator app, enabling it to register with our site.
On our user profile page, the following code is behind the checkbox.
IF NOT NewUser THEN
	IF ckEnable2FA
		IF NoSpace(edtEmailAddress) = "" THEN
			Info("Email address is required for Two Factor Authentication")
			ckEnable2FA = False
			RETURN
		END
		Glo.recUser.TOTPKey = TwoFactorAuthenticationGenerateTOTPKey(edtUserID + edtEmailAddress)
		popRegister2FA.bar2FA = TwoFactorAuthenticationGenerateLink(Glo.recUser.TOTPKey,edtEmailAddress,"wxPerts Social Signon Demo")
		popRegister2FA.stcTOTPKEy = Glo.recUser.TOTPKey
		PopupDisplay(popRegister2FA)
	ELSE
		Glo.recUser.TOTPKey = ""
	END
END
When creating a new account, we need to wait until the account is saved. This is because we use the UserID as part of the Identifier string to generate the TOTPKey. There is additional code behind the Save button to manage the generation of the code for a new account.
Next, we utilize one of the three WL functions necessary to implement this entire process. The function, TwoFactorAuthenticationGenerateTOTPKey, requires a unique identifier string. This can be any string that uniquely identifies the user in your system. In this case, I’m using a combination of the UserID and their email address. Note the resulting TOTPKey is stored in the database field we created earlier.
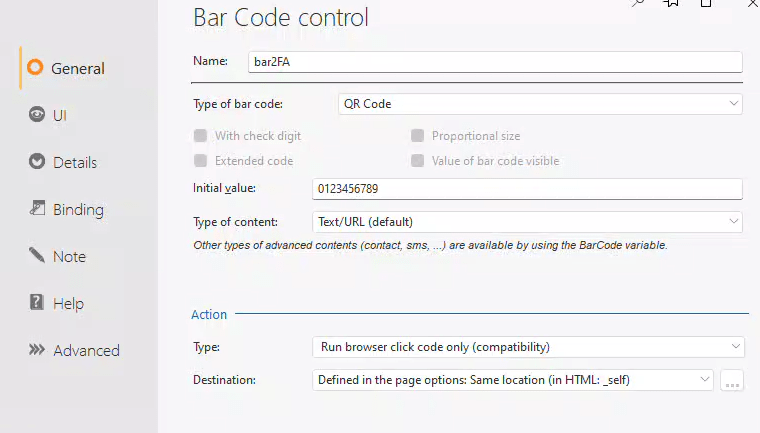
We employ the second function out of the three, TwoFactorAuthenticationGenerateLink, to generate the QR code for the TOTPKey. Note that the other two parameters are the account and site description, which are displayed in the Authenticator app.
The result of that function is placed in a barcode control, set up as a QR code on our popup. It also includes a static display of the TOTPKey for manual entry.
Finally, if they uncheck the box, we remove the TOTPKey from the record.
That’s all it takes to generate the code and display a QR code, allowing the Authenticator app to register our site! It requires just two functions and a few lines of code!
As mentioned above, the same code is also included on the save button. It is triggered only when the NewUser Boolean is true, allowing it to execute after the UserID is created.
Let’s examine the login code. If you read my recent post Password Hash Primer for WEBDEV, you might recall that I presented this code and mentioned the Check2FA() procedure will be explained in a future article. Well, this is that article!
PageToFile()
tmpPassword is string = NoSpace(edtPassword)

// Look For User Record
mgrUser.Filterstring = [
	WHERE emailaddress = '[%NoSpace(edtEmail)%]'
]
mgrUser.FetchData()
IF ArrayCount(mgrUser.arrRec) = 1 THEN
	Glo.recUser = mgrUser.arrRec[1]
	IF Glo.recUser.isPasswordValid(tmpPassword) THEN
		Check2FA()
	ELSE
		VariableReset(Glo.recUser)
		Info("Sorry we are unable to verify you login information, please try again.")
		RETURN
	END
ELSE
	Info("Sorry we are unable to verify you login information, please try again.")
	RETURN
END
After validating the user’s password, the Check2FA procedure determines if any 2FA options are enabled. If no options are enabled, the process concludes and the Home page is displayed.
PROCEDURE Check2FA()

IF Glo.recUser.Use2FA THEN
	Process2FA("Authenticator")
ELSE IF Glo.recUser.Use2FASMS
	Process2FA("SMS")
ELSE IF Glo.recUser.Use2FAEmail
	Process2FA("Email")
ELSE
	PageDisplay(home)
END
Observe that the remainder of the procedure uses the same Process2FA function, but with different parameters. I designed the original application this way because we are essentially performing the same action: comparing the code input by the user with the expected code. The only difference is the method of checking the code. Today, we will examine the “Authenticator” version.
Here is the complete code for the ‘Process2FA’ procedure.
PROCEDURE Process2FA(AuthType)

Mode2FA = AuthType

btnSendSMS..Visible = True
btnSendEmail..Visible = True
btnUseAuthenticator..Visible = True

IF NOT Glo.recUser.Use2FASMS THEN
	btnSendSMS..Visible = False
END
IF NOT Glo.recUser.Use2FAEmail THEN
	btnSendEmail..Visible = False
END
IF NOT Glo.recUser.Use2FA THEN
	btnUseAuthenticator..Visible = False
END

SWITCH AuthType
	CASE "Authenticator"
		btnUseAuthenticator..Visible = False
		stcPleaseEnter = "Please enter the code from your Authenticator app"
	CASE "SMS"
		btnSendSMS..Visible = False
		stcPleaseEnter = "Please enter the code from your SMS"
		recResetRequest = mgrResetRequest.createRequest("2FA")
		retJSON is JSON = TW.Send2FAOTP(Glo.recUser.MobileNumber,recResetRequest.Hash)
		IF retJSON.Success = False THEN
			ToastDisplay("Unable to Text One Time Passcode " + CR + retJSON.ErrorMessage,toastLong)
		END
	CASE "Email"
		btnSendEmail..Visible = False
		stcPleaseEnter = "Please enter the code from your EMail"
		recResetRequest = mgrResetRequest.createRequest("2FA")
		retVal is string = MG.Send2FAOTP(Glo.recUser.emailaddress,recResetRequest.Hash)
		IF retVal[[1 TO 6]] = "Failed" THEN
			ToastDisplay("Unable to Email One Time Passcode " + CR + retVal,toastLong)
		END
END

PopupDisplay(popGet2FA)
Note that for the Authenticator mode, we are merely setting up some display fields. In contrast, with the SMS or Email options, we must generate the code and send it ourselves. Now you can see why I prefer the Authenticator App method!
The code for the ‘Continue’ button on our pop-up (popGet2FA) incorporates coding for all 2FA modes. As before, the version for the Authenticator is significantly simpler.
RetVal is boolean = False
SWITCH Mode2FA
	CASE "Authenticator"
		RetVal = TwoFactorAuthenticationCheckCode(edt2FA,Glo.recUser.TOTPKey)
	CASE "SMS"
		recResetRequest = mgrResetRequest.ValidateResetCode(edt2FA)
		IF recResetRequest.ResetRequestID > 0 AND recResetRequest.UserID = Glo.recUser.UserID AND recResetRequest.ResetType = "2FA" THEN
			RetVal = True
		END
	CASE "Email"
		recResetRequest = mgrResetRequest.ValidateResetCode(edt2FA)
		IF recResetRequest.ResetRequestID > 0 AND recResetRequest.UserID = Glo.recUser.UserID AND recResetRequest.ResetType = "2FA" THEN
			RetVal = True
		END
END
IF RetVal THEN
	PageDisplay(home)
ELSE
	Info("Sorry that code is invalid or has expired")
END
We simply call the third and final function of the WL TwoFactor functions, TwoFactorAuthenticationCheckCode. We provide it with the code that the user entered, as well as the TOTPKey we stored on the user’s account. It performs the necessary calculations to determine if the entered code is valid, then returns either true or false for us to act upon.
What’s Next
That’s all it takes to add Authenticator App support to your WEBDEV sites. It’s very simple! Just one database field, two popups, and three function calls are all you need.
The holy grail of password management is a concept formerly known as “Passwordless,” now referred to as “Passkeys”. These are not only difficult to spoof or steal, but they also make it easier for the user to log in. I’m preparing an article exploring how to implement Passkeys in WEBDEV.
This example is from our wxSocial project, which you can view online at https://wxsocial.wxperts.com/. The project employs several of our helper classes to streamline the management of OAuth and OpenID communications, HTTP communications, JSON Web Tokens, and Cookie Management.
wxPerts offers these classes along with other 3rd party API classes, to our consulting and mentoring clients. If you’re interested in integrating any of these classes, please contact us at sales@wxperts.com.
