
Another exciting new feature added with version 2024 was Feature 014: Customize You Apps: Create You Own Skin Templates or Your Own Skins Using The Available Templates. Unfortunately, you won’t find any mention of this feature in the help section. But don’t worry, Uncle Pete is here to save the day!
What does this mean and why should I care?
First, let’s clarify the terminology. In this context, “Skin Templates” refers to WINDEV and WINDEV Mobile, while “Skin” refers to WEBDEV. Both are used for styling your application and maintaining a consistent style. However, due to the specific nature of WEBDEV, it requires a different approach; as a result, a Skin cannot be used for both WINDEV and WEBDEV. For simplicity, we’ll refer to both as “Skins” in this article. While the information here primarily covers creating a WEBDEV skin, most of it should also apply to WINDEV Skin Templates.
Here’s why this is important to you: you can now start with one of the provided Skins, clone it, and use it for your projects, editing the included styles directly. I’ve always suggested duplicating the provided styles, even if you don’t make any changes. This creates a project style.
The rationale behind this is that Skin styles can’t be modified, so if you decide to make a change later, you’d have to go back and adjust every control. However, if you create a project style and use it, you can then edit your style, and it will automatically apply to all the controls using it. This duplication of styles results in an abundance of skin and project styles, making it more challenging to maintain organization and consistency in your styling.
This new feature combines the best of both worlds! You can now clone an entire Skin and apply it to your projects. This is similar to duplicating every skin style as a project style, and then eliminating the project styles. The advantage, however, is that it’s a Skin, and can be used for other projects. This eliminates the need to recreate project styles from one project to another, which is particularly useful for developers in a corporate setting who may be working on multiple projects and need to maintain a consistent corporate style.
On with the Show
Let’s get started. Today, I’ll create a Skin to be used by the Modern Web Design Series. As I mainly use Tailwind CSS for all the styling in this series, I prefer to start with a Skin that has no initial styles. We will be adding a few styles to the Skin as we progress.
As previously stated, the documentation doesn’t provide information about this feature. After a diligent search, I found the option under the Project tab on the Ribbon bar: More actions>Clone project skin.

However, don’t search for it right away. It only becomes visible when you have a WEBDEV project with a Skin open. So, you’ll need to open a WEBDEV project first. Once you’ve done so, the “Clone project skin” option will appear, and you can clone any Skin, not just the one assigned to this project.
Unfortunately, it doesn’t allow me to start with a blank Skin, so I’ve chosen the 250 Phoenix Skin. I’ve named it wxTailwind. Remember to uncheck the “Set as default skin for the project” option if you don’t want this to impact the currently open project.
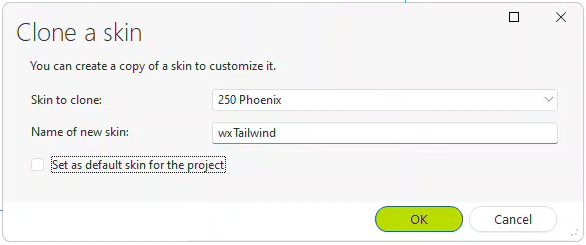
💡 If you want to clone the skin of an existing project for use in a new project, you would select the "Skin of the Project" option and leave the checkbox selected. I haven't explored these options as I was focused on creating a completely new skin, unrelated to the existing project.
💡 Warning: If you are using the SCM, pressing 'OK' may not provide immediate feedback. It may seem like nothing is happening for a while. If you're not using the SCM, the action is quicker, but there's still no confirmation that anything has been done.
💡 Warning #2: Avoid using the same name for the skin as your project. Trust me on this one 🙂
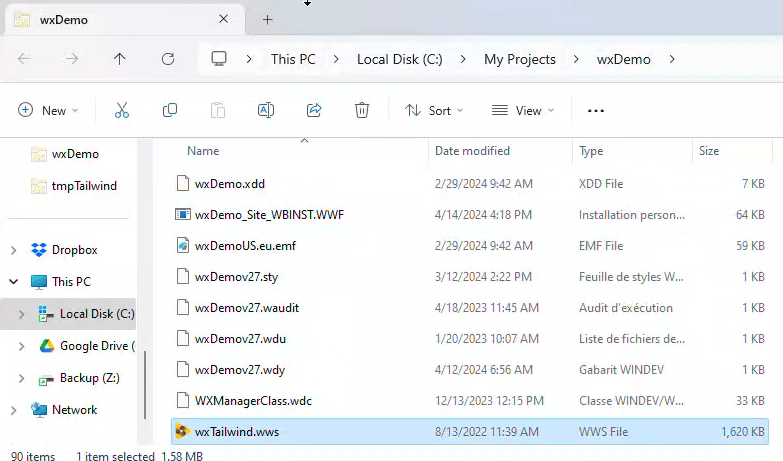
This action creates a new folder named ‘wxTailwind’ within the project folder. This new folder contains our Skin.

An additional file, wxTailwind.wws, has also been created in the project root folder.
If we had chosen “Set as default skin for the project”, we would be ready to go. However, we want this Skin to be available for our other projects, so we need to copy it to the IDE. As I have installed the IDE with WEBDEV and WINDEV Mobile integrated with WINDEV, the folder for me is C:\WINDEV 2024\Personal\Skins. Ensure you also copy the wxTailwind.wws file into the new folder; otherwise, you will not have any styles.
💡 My project was using in the Source Control Management (SCM), which made all files read-only when the new Skin was added. To solve this, I used Windows Explorer to remove the read-only attribute from all files in the newly created folder. As I'm not using the Skin in this project, I removed the folder from the SCM and deleted it from the project folder.
When you create a new project, you will see our new Skin listed as an option.

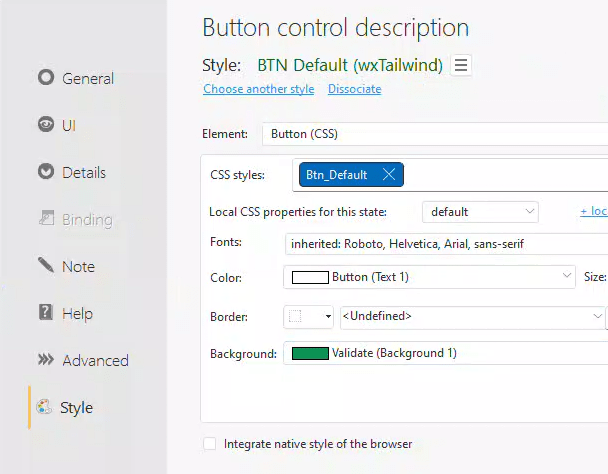
If we create a page and a control in this project and attempt to select a style, we’ll find that all the Skin Styles from the cloned Skin are now available in our new wxTailwind Skin.

If you have a project with your standard styles established and you’ve cloned that project’s skin, you now have your own skin that you can use for projects. At this point, your task is complete.
Maintaining the Skin
We want to be able to maintain the Skin in case we create a new style that should be globally available. Right now, this isn’t possible because our new Skin behaves the same as the Skins supplied by PCSOFT. We cannot directly edit the styles. We can only override any settings we want to change on each control. Alternatively, we can create a project style based on the Skin style, edit it, and use that style.
I’m not entirely certain about PCSOFT’s intended management approach, but I can only envision two possible methods.
Method 1: When creating a new style, you would clone the project skin again and replace the folder under the IDE’s Skins directory. However, this method seems unmanageable, particularly if multiple projects are using the skin.
Method 2: Create a new project, naming it identical to your skin, and select the new skin for this project. In my case, this involved creating a project named ‘wxTailwind’ and selecting ‘wxTailwind’ as the skin. This is the method we are going to use.
Once you name a new project the same as the Skin, it becomes your maintenance project. For instance, if you decide to change the BTN_Default style for buttons to use a different color, you can create a page featuring a button with that style.

If we alter any of our style settings, we can either create a new style with these changes or apply them to the existing style. Note that it indicates there is one override on the style.

The “Propagate” option was not available in Method 1. Upon clicking the “Propagate” link, our style modifications become integrated into the style itself, eliminating any previously shown overrides.
Now comes the real magic. Copy the wxTailwind.wws file from the wxTailwind project’s root folder to the wxTailwind folder you created under the IDE’s SKIN folders, replacing the existing file.
If we open a project using our custom Skin (wxTailwind) and select the Project→Recompile and Synchronize→Update Skins option, it will copy over any changes made to the Skin from the IDE folder.

Any controls using the style we modified will now reflect the changes we made, without the need for us to individually adjust each control.

This approach will not only save considerable time when adjusting control styles across multiple projects, but it also eliminates the chance of overlooking some changes. It will be a game changer for those working on several projects with shared styling, such as in a corporate environment.
Starting with a Clean Slate
Since I plan to use this skin with the TailwindCSS styles I am creating, I don’t want any of the existing styles in my wxTailwind skin. To achieve this, I deleted the wxTailwind.wws file located in the root folder of my wxTailwind project. Be sure you do not have the project open while doing this.
Once the wxTailwind.wws file is deleted, opening the wxTailwind project in the IDE will generate a new wxTailwind.wws file, which will not contain any styles.

While we’re on the subject, I also want to ensure that my Skin doesn’t include any CSS styles, Fonts, or Icon Fonts. By navigating to Page → Styles → Edit CSS Styles, I can confirm that there are no CSS styles included.

Navigating to Page→Styles→Edit Font List reveals that there are no Fonts or Icon Fonts.


I’ve already explained why I don’t want any fonts in this post.
A future post will discuss Icon Fonts.
Now, you can copy the new wxTailwind.wws file from the project folder back to the IDE Skin folder. Doing this will remove all styles from your Skin. Inside the IDE Skin folder, I noticed a Font folder containing the Roboto font. This is no longer necessary, as all existing styles have been removed. Therefore, I delete the Font folder too. There may be other Fonts and Icon Font depending on which Skin you started with.

Adding a pageBasic style to my blank slate
As mentioned earlier, I don’t require many WEBDEV styles with my TailwindCSS approach. However, a few prove useful. The first one will serve as the basic page style for our pages.
Open the wxTailwind project and create a page if one does not already exist. In the page description, go to the ‘Style’ tab. Select the ‘Browser Background’ element and then expand the options for ‘Background color’.
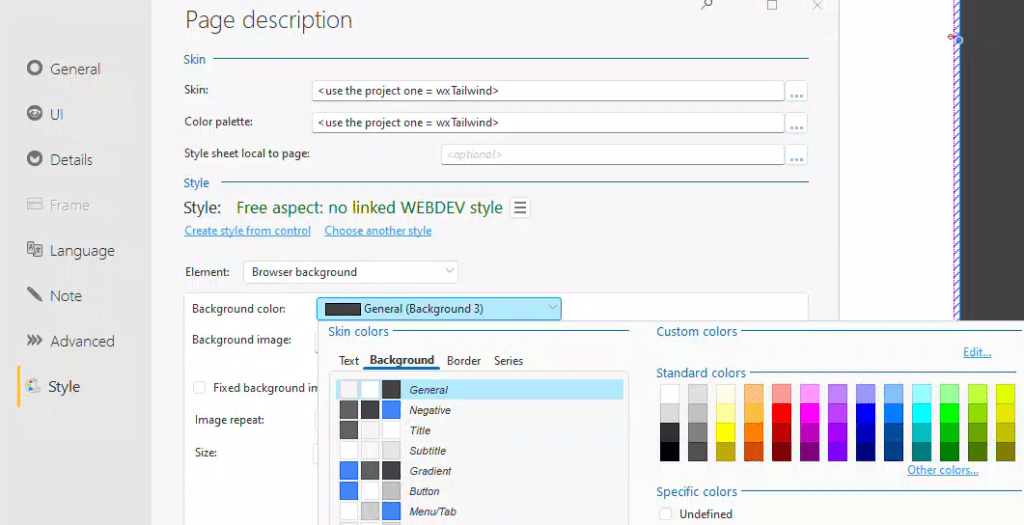
We won’t use any of the standard palette colors. Instead, we’ll create a custom palette color. Click the “Edit” link under custom colors. Then click the “+” button to add a custom color. Name it neutral-50 and set the R, G, and B values to 250.

💡 You might be wondering why we use the specific name neutral-50 and the values of 250. This is because we're replicating one of the standard colors in TailwindCSS, which will be discussed in a future article. The reason for using this color as our browser background is that it's recommended not to use pure white for your page background. A slightly off-white color will make your page feel much warmer and easier to read. You can read more about this and other visual design rules in this excellent article: https://anthonyhobday.com/sideprojects/saferules/?utm_source=tldrnewsletter
Clicking “OK” changes the browser’s background color to the new custom color. The remaining options should be left as <Undefined> or blank.

Change the “Default font” element and set its values to blank or “<Undefined>” as well.
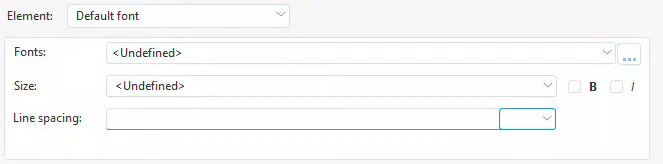
The default colors also get changed to <Undefined>.

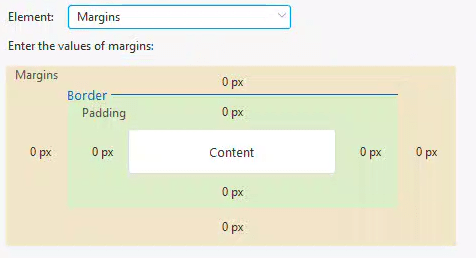
For the page border/background, set the Type to CSS and choose the same custom color for the background. Leave the rest as blank or <Undefined>.

All margins should be set to 0.
Tooltip (CSS), you guessed it, set all to blank, <Undefined>, or <Inherited>

We will leave the page scrollbar as native.

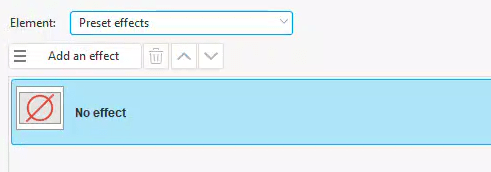
We don’t require any preset effects.
And the other is blank.

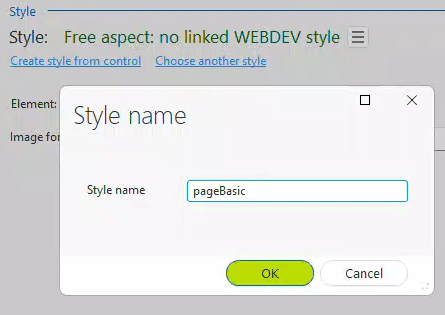
Finally, you can now click on the “Create style from control” link and name it “pageBasic”.
Remember to copy the Tailwind.wws file to the IDE Skin folder. Doing so will make this style a part of the skin.
💡 You might notice that I've defined a custom palette for this project, also named wxTailwind. Unfortunately, it seems that the custom colors are created elsewhere in the project, not within the palette itself. This prevented me from utilizing it as I initially intended. If you're not adopting my approach of using Tailwind colors and plan to use the palette in the standard WEBDEV way, having a custom palette for your Skin could be advantageous. I plan to contact support to see if there's a method to share the custom colors that I haven't discovered yet.
Adding a swActive style
I also require WEBDEV styles for switch controls. It seems there’s a bug preventing the application of CSS styles to the switch control. I plan to report this issue to support.
In this case, I have already styled my control the way I want in another project. So, I can copy and paste that control onto the page in my wxTailwind project. From there, I can make any additional style tweaks. For me, this involved ensuring there were no font settings on the captions, allowing them to inherit my font settings from Tailwind.
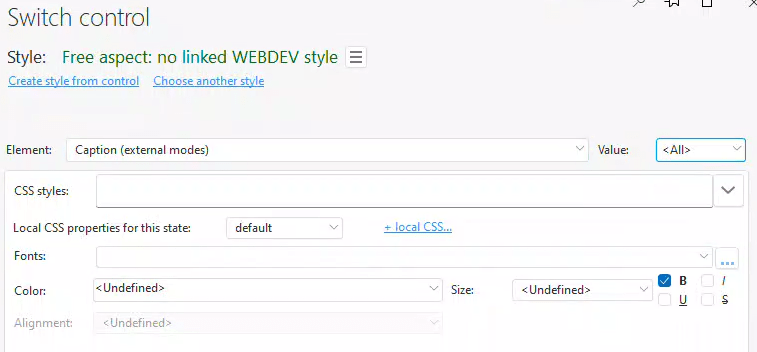
Now, you can create your style by clicking the “Create style from control” link. Don’t forget to copy your Tailwind.wss file into the IDE Skin folder, and update the skin in any projects that are using your Skin.
Preset Page Templates
If, like me, you were hoping to include your own page templates in the list of Preset page templates when creating a new page, I regret to inform you that this functionality is not currently available. I asked support and they confirmed it, but they have forwarded the suggestion to the development team. Hopefully, we will have this feature in the future. Until then, you will need to create and share actual page templates.
What’s next
Now that I’ve created a custom, blank-slate Skin for our Modern Web Design project, I’ll proceed with developing the project and layout. After that, I’ll delve into the advanced resizing and responsive techniques I’ve been previewing in short videos on our Facebook group.

2 thoughts on “Creating Your Own WEBDEV Skin”