Let’s talk about Favicons. While this might seem like a simple topic for an article, Favicons have evolved significantly since the early days of the web, and it’s one area where WEBDEV has fallen behind. We need to cover this topic before moving on to our next subject: Progressive Web Apps. So let’s dive in!
What is a Favicon
While you likely know what a favicon is, it’s a bit more complex than you might think (as you’ll discover throughout this article). In simple terms, it’s the icon that appears in your browser tab and bookmarks for a website.
WEBDEV’s Favicon implementation
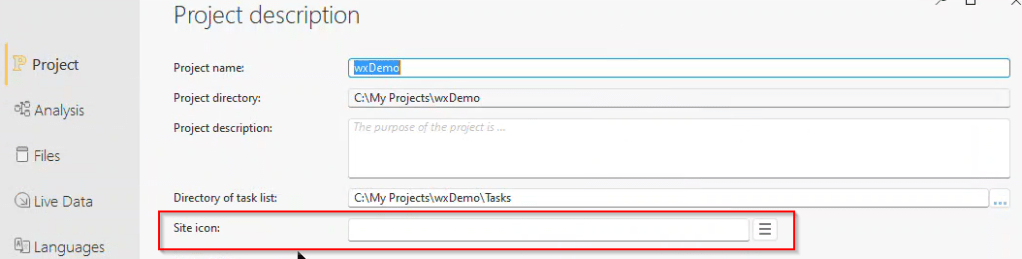
WEBDEV’s implementation is fairly simplistic, as Favicons were for a long time. Simply go to the project description, find the Project tab, and locate the Site icon section. Add an appropriate image file there (I tend to use PNGs), and voilà—your site has a Favicon!
💡 To be fair, WEBDEV has made progress in supporting icons for iOS web apps. However, I haven’t researched whether it generates a proper manifest file. Since it wouldn’t cover all our needed features and has other issues that don’t occur with my Progressive Web Apps implementation (which you’ll see in the next article), it’s simpler to use the external process I outline below.
Favicons just aren’t that simple anymore
Why write this article if it’s so simple? Because nowadays, it’s actually quite complex. You need to provide multiple icons with different sizes, shapes, backgrounds, and formats. Favicons are used for many purposes beyond that tiny browser tab icon.
When you bookmark a page to your phone’s home screen, you need a larger icon—and it gets even trickier. Apple requires different icons than Android, and Google needs its own specific icon for search results.
The complexity has grown significantly. Along with our icon files, there’s now a Web manifest file that lists our icons and their uses—you’ll learn more about this in the next article.
Another WEBDEV-specific challenge involves the Site Icon being set at the project level when using multiconfigurations. As I’ve written about before, some projects generate three or more websites from the same project file, and these sites often need different Favicons. Since the setting is project-wide, there’s no built-in way to set different icons. Fortunately, the solution we’ll implement for Favicons will solve this issue too.
So what’s a developer to do? You’d need to research Favicons, master all the required formats, create the icons, learn the Web manifest file structure, and stay current with every browser and OS vendor’s requirements. Whenever they change their icon specifications, you’d need to update everything.
Wait—that doesn’t sound like Uncle Pete’s style at all, does it? Well, read on and I’ll save you from all that drudgery!
Real Favicon Generator to the Rescue
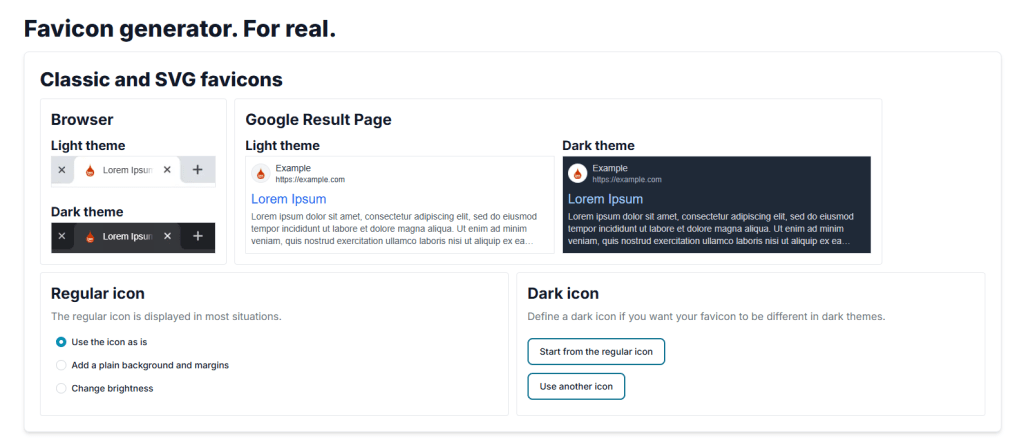
RealFaviconGenerator is a website that generates all the icon files and Web Manifest files you need for your website. Simply drop your current icon on the page, answer a few questions, and within 5 minutes, you’re ready to go. It handles all the required dimensions, background adjustments, and even creates a scalable SVG version of your icon. As a bonus, it will check your current website and let you know if your favicon meets all requirements. And yes—it’s free!
Let’s look at what happens when I drop the wxPerts icon image on the page. The first section covers the original Favicon, showing how it will appear in various situations and offering options to customize it.
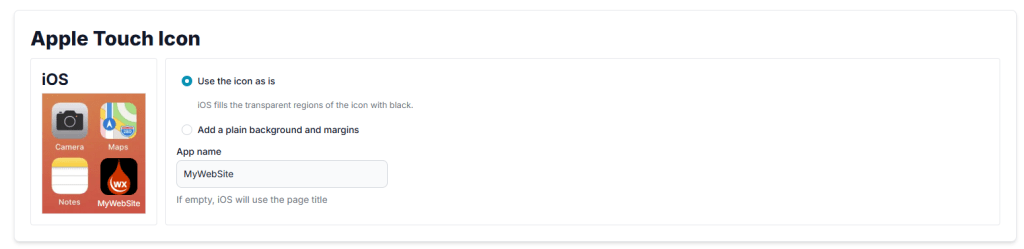
Next comes the Apple Touch section for iOS. By default, the icon has a black background and the app name shows as “MyWebsite”—I’m going to change both of those.
I’ve now updated it to have a white background and display “wxPerts” as the name
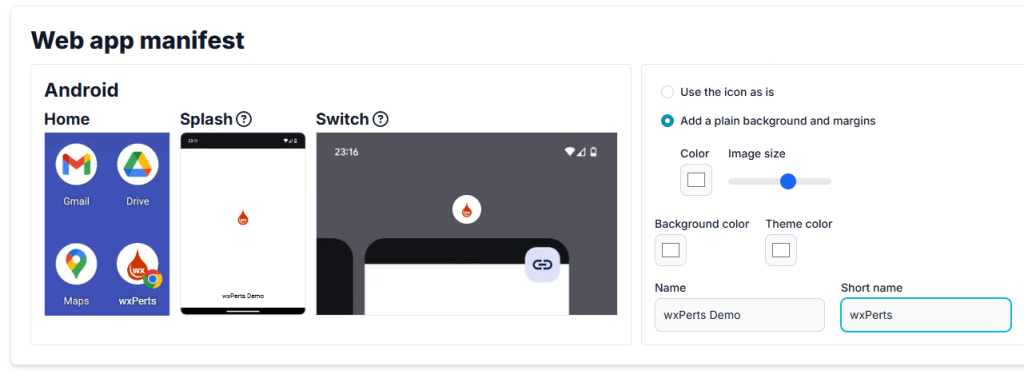
Next comes the Web App Manifest section
Again I made a few tweak here
💡The Apple Touch and Web app manifest sections will become more important in the next article when we discuss Progressive Web Apps.
The final two sections cover discontinued features for Windows Metro and MacBook Touch, along with the Favicon path settings. For now, we can leave the path as-is. We can modify it later in the Manifest file and links if needed—for instance, if you want to store these files in a folder other than the _WEB folder of your project. This would be necessary when using different icons for multiconfiguration, as mentioned earlier.
After clicking “Next,” it generates all the files and provides a zip file containing everything. The page also offers an option to make a donation—if you’re using this for a commercially viable website, please do the right thing and donate!
Be sure to also copy the text for the <head> section as we will need that shortly well.
Now what?
Now that we have the zip file from the Real Favicon Generator and the text for the <head> section, what’s next? First, we need to go back to that project setting we discussed earlier and clear the site icon if one is set—otherwise, it will interfere with our new stuff.
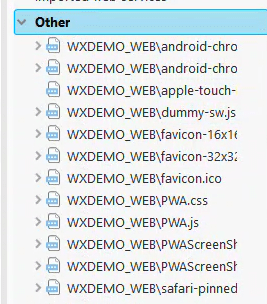
Next, unzip the downloaded file into your project’s _WEB folder. My zip file contained 7 files, though this number may vary depending on your chosen options and current Favicon requirements.
Since we placed them in our _WEB folder, they will automatically be uploaded to the website the next time we publish. However, we should still add them to the SCM (you are using the SCM, right? RIGHT?!!). This is especially important in a multi-developer environment—otherwise, other developers won’t have the files in their _WEB folder.
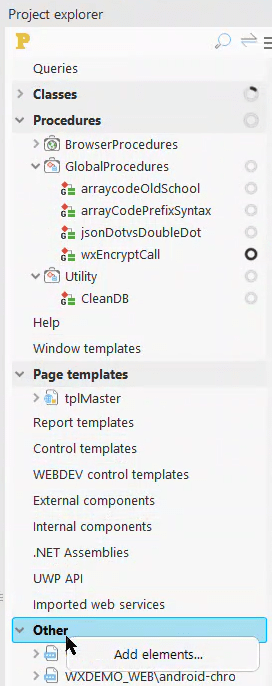
To add these files, simply use the Project Explorer’s Other section, right-click to add elements, and select the files from the _WEB folder.
Adding files this way incorporates them into both the project file and the SCM (if you’re using source control). It’s a convenient method to ensure that any supplementary files—even those not directly part of your WEBDEV project but essential for your website—are properly maintained and accessible to all developers. I rely on this feature heavily, as evidenced by the numerous files in my Other section. You’ll learn about some of these files in the next article.
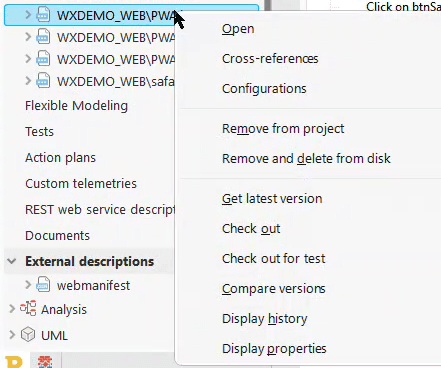
💡If you’re using the SCM and add your files to the Other section, you’ll need to check them out before editing—just like any other file. Right-clicking a file gives you the option to check it out and open it in an external app (if one is configured for that file type).
The final step is adding the text for the <head> section to your page. Navigate to the page description’s Advanced tab, where you’ll find a section for HTML code that goes in the page header. This is the <head> section. Paste the text in there.
If you’ve read my other articles or spent time with WEBDEV development, you’ve probably noticed the issue with these instructions. Adding the <head> section to a single page only makes the Favicon available on that page. Instead, add it to the <head> section of your page template (you are using page templates, right? RIGHT?!). This way, all pages using that template will display the Favicon.
For multiconfiguration scenarios requiring different Favicons, simply place the files in separate folders under the _WEB folder, update the references to include the folder names, and use the appropriate references in the <head> sections of the different sites.
After publishing these changes, your site should have working Favicons, and you’ll get a clean report when running the Favicon checker.
What’s Next?
As I mentioned at the beginning of this article, completing this step is essential for creating a Progressive Web Application. If you’re wondering what that is—it’s a method that allows users to install your website like a regular application. The site runs without an address bar and behaves more like a native app, which is particularly useful on mobile phones. Stay tuned for that upcoming article!