
That’s right I got dad jokes for miles 🙂 We have been having some issues with the slider control on a project. What is happening is some times the Cursor (the ball portion) of the slider doesn’t show up at all, other times it shows up on the wrong plane, I haven’t managed to reproduce it consistently enough to report to support yet, and to be fair the interface is a bit complicated as we are using a popup control, with an internal page control to host an internal page as a popup, and on that internal page we are using a couple of planes on a cell to display different forms. It seemed like a good time to break out the Jquery UI Slider Pips plugin that I have used in another project and eliminate the issue, and get a more attractive control at the same time.
Step one is to head over to https://simeydotme.github.io/jQuery-ui-Slider-Pips and download the JavaScript and CSS files. There are lots of examples and details for all the options there as well, we will cover a few of them below.
I was hoping to use the Web Component method to demonstrate how to add this library to your project, but unfortunately we once again end up with conflicts with the jQuery and JQuery UI used by PCSOFT. So instead we will use the manual method similar to how we added the Date Picker files in this post be sure to check that post out for more details as well as an attractive date entry control
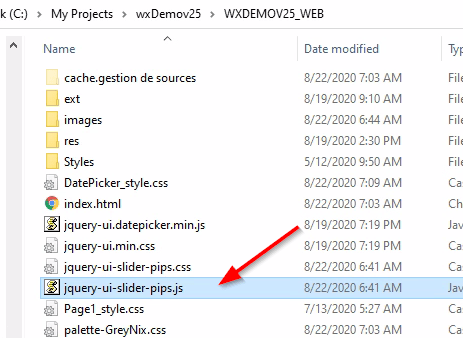
I copied to the JavaScript file (jquery-ui-slider-pips.js) into my projects _WEB folder via File explorer
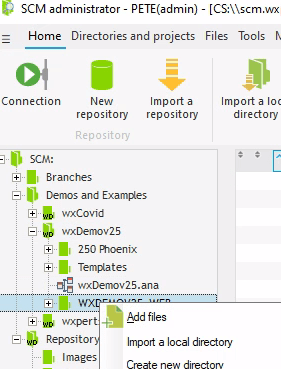
Since we did this manually, it did not get added to the SCM, and you definitely want it in the SCM especially if you are working with multiple developers! So back over to the IDE, and on the SCM tab of the ribbon bar we click Manage, then navigate to the _WEB folder, right click and choose add files, and select the JavaScript File.
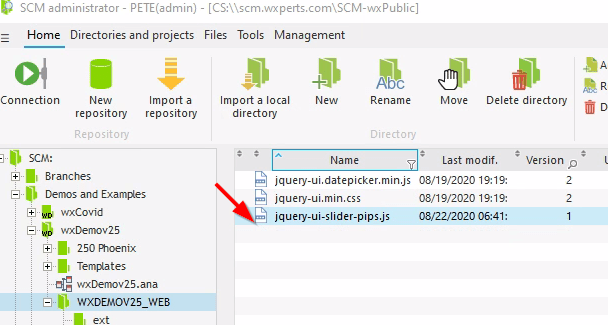
Afterward it should show in the SCM like this
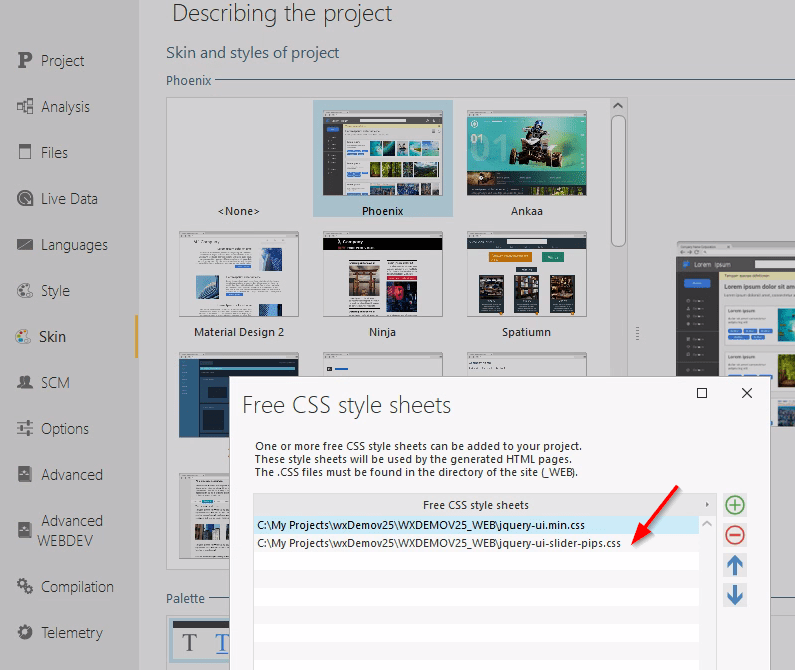
We need to add the CSS file (jquery-ui-slider-pips.css) but we don’t need to do any extra steps to get it in the SCM as we are going to add it via the interface, so back to the IDE, go into the project description and on the Skin tab, click on the “Free CSS style sheets” button and select the file , if you are using the SCM when you save it, it will add the file to the SCM automagically.
While we are still on the Project Description there is one more thing we need to do. On the Advanced WEBDEV tab. Note: I am using the WINDEV with WEBDEV integrated IDE, if you are using just WEBDEV I believe it will just say Advanced. Click on the little … button next to HTML standard and turn off “Compress ALIAS and JavaSCript procedure names” and “Compress JavaScript code”. With those turned on the JavaScript ID’s for our controls are like A1,A2, etc. which might save a bit of space, but sure ain’t easy when writing code, especially since they can change as you add, delete controls!

We are almost done with the project setup stuff. We need to pull the library into our page, since we can’t do it via the project description area. You can do this page by page on the pages you need it, or if you are an Uncle Pete disciple I know you are using page templates and can do it on your page template and be done with it.
Of course the wxDemo project uses a page template, so that is where I am going to make the change, in the Init Area you need to add a line of code to include the library like this. Notice we already had the code from the previous mentioned date picker so we just added an extra line to also load the slider pips library. They are independent and if you don’t need the date picker you can leave that line off.

MyPage..HTMLEndPage += [
	<script src="/[%FolderWeb()%]/jquery-ui.datepicker.min.js"></script>
	<script src="/[%FolderWeb()%]/jquery-ui-slider-pips.js"></script>
]
Now we are ready to actually use the Slider on a page. So create an HTML control on the page sized were we want the slider to be.
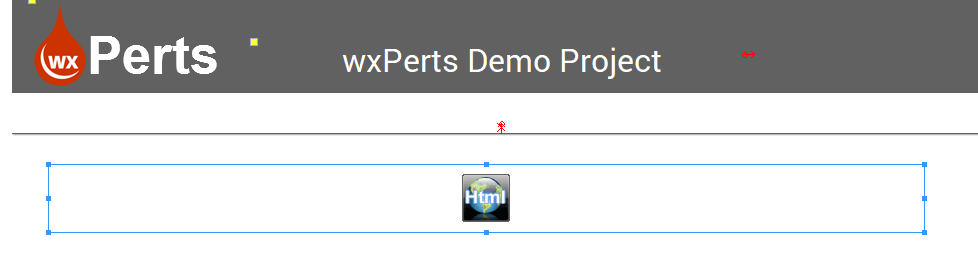
Next we need to add some HTML code with a DIV section to that control. A little tip from your Uncle Pete, if you add directly the code directly to control via the Edit the HTML Source Code, the control doesn’t show anything in the IDE, since it is just an empty DIV. This makes it harder to visualize, so we are going to add the code in the Load Browser event, so the HTML symbol stays visible.
I named the HTML control htmlSlider1 so all we need to do is place an empty DIV in it that will eventually house the slider, we give the DIV an ID (slider1) so we can target it with jQuery later, and we set the class to Slider so it sees the default CSS from the file we imported earlier.
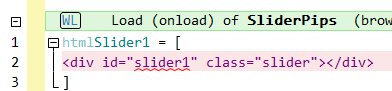
htmlSlider1 = [
<div id="slider1" class="slider"></div>
]
And then we initialize the slider with some jQuery code
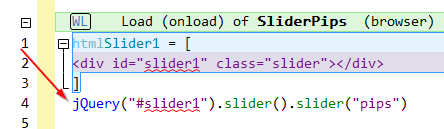
jQuery("#slider1").slider().slider("pips")Over on simeydotme page, you will notice the JavaScript code was written like this
$(".slider").slider().slider("pips");So how did I translate that to the WEBDEV code? YEARS OF GOOGLING! Let’s break it down.
- The $ is the equivalent of the jQuery command in WEBDEV
- The next portion is the Selector. There are literally books written on jQuery selectors but a good reference can be found at https://www.w3schools.com/jquery/jquery_ref_selectors.asp, In fact W3 Schools has lots of great info on all things HTML, CSS and JavaScript related
- In the example code they are using the class selector (.) and targeting any HTML element with the slider class. Which means if you have two DIVs both with the Slider class, they would both be effected, we only want to effect a specific DIV
- So in our code we are using the ID selector (#) to select the slider1 DIV we created, and now you know what we gave it an ID
- The rest of the code is more or less the same as the JavaScript code but will get more complicated shortly
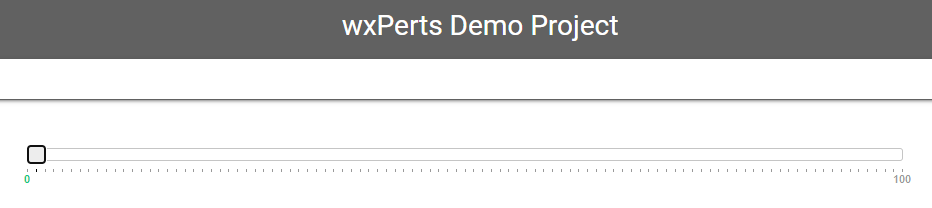
If you test the page at this point you can see we already have a nicer looking slider, but it isn’t incredibly useful. So lets do a couple of examples
Example 1, select a dollar value between 1 – 10
Our first example is going to be a simple slider to select a dollar value between 1 – 10.
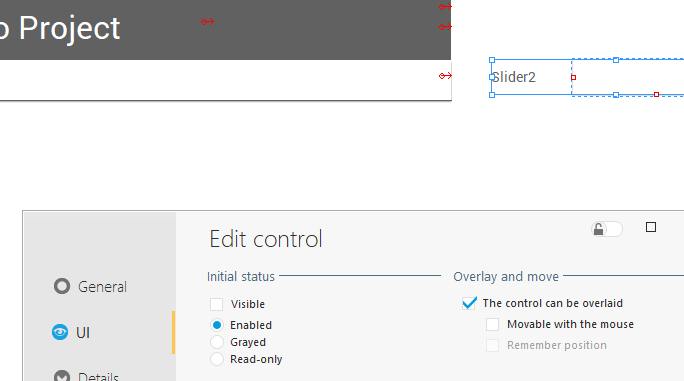
We create a new HTML Control and just like our with the date picker, we need to add a hidden control to hold our database value and bridge the browser server gap. I named it edtSlider2. Normally i would made it invisible, allowed override and placed it off the page, like the below screen shot. If you follow my articles and videos, you know this is a technique I use often. However so we can see the value changing in the demo, I made it visible and placed it on the page.
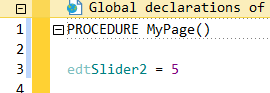
Normally that control would be linked to a database field, but since this is just an example and not production code, it isn’t linked to anything, but I did add a line of code to the global section of the code to simulate a linked field and FiletoPage().
Before we look at the browser code, there is one topic, that we haven’t discussed yet. In reality we are using the Jquery UI Slider widget for the base slider, the Pips is a plug-in that extends the Slider widget with additional functionality. There are a considerable number of options available for the slider as well and we will need to set some of those options as our examples get more complex. You can find out about all the options of the Slider on the JQuery UI site. Also there are actually two components of the Pips plug in, Pips and float. Pips controls the dividers, scale, and labels of the slider, while float controls what is display while moving the handle of the slider.
Another tip from your Uncle Pete. You will notice on the simeydotme page the example JavaScript code is written like the below, which is using inline options. I find that style of coding is very difficult to translate to the WEBDEV jQuery command, especially as the options get more complex or we need dynamic vlaues. Instead I use JavaScript objects to pass the options as you will see shortly
$(".slider")
    .slider({
        max: 12,
        range: true,
        values: [5, 15]
    })
    .slider("pips", {
        rest: false
    });
So let’s look at all the browser code in the Load event for this looper, then we will break it down line by line
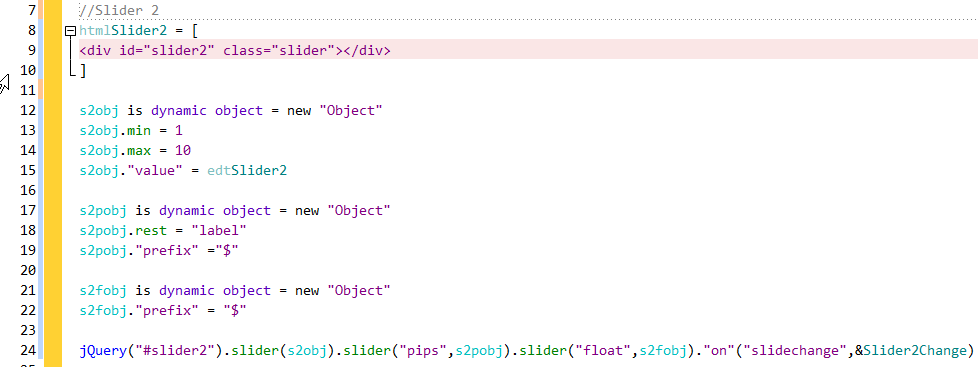
htmlSlider2 = [
<div id="slider2" class="slider"></div>
]

s2obj is dynamic object = new "Object"
s2obj.min = 1
s2obj.max = 10
s2obj."value" = edtSlider2

s2pobj is dynamic object = new "Object"
s2pobj.rest	= "label"
s2pobj."prefix" ="$"

s2fobj is dynamic object = new "Object"
s2fobj."prefix" = "$"

jQuery("#slider2").slider(s2obj).slider("pips",s2pobj).slider("float",s2fobj)."on"("slidechange",&Slider2Change)- Lines 8 – 10 are just populating the emtpy DIV into our new HTML control, this time giving it the ID of slider2, so we can target it separately.
- Line 12 is creating a JavaScript object, we are going to create a total of 3 objects, so I have adopted a naming convention a prefix s2 = slider2, then if it is an object for the Pips I add a p, or if it is for the float options I add an f. And finally a suffix of obj. So this object s2obj, is setting the slider options for slider2
- Line 13 and 14 set the min and max value of the slider, to 1 and 10
- Line 15 sets the current value of the slider, notice we are using the value from our hidden edit control, his is how we communicate between the browser and server and in a production application access the database value.
- Notice “value” is wrapped with quotes, Intellisense wants to capitalize Value since it is a WEBDEV keyword, and remember JavaScript is case sensitive, so in order to avoid any issues we wrap it with quotes
- Line 17 is creating another JavaScript object following our naming convention, we know this is setting the Pip options of slider2
- Line 18, makes all the Pip labels show instead of just the min and max like the default
- Line 19 prefixes the labels with a $, so they read $1, $2, etc. Notice we need to wrap prefix with quotes to avoid Intellisense issues
- Line 21 creates our third JavaScript object to set the float options
- Line 22 set the prefix to a $ so our float will display the same as our Pips
- Line 24 looks a bit scary but if we break it down you will see its fairly straight forward
- We already know that the jQuery is the equivalant of the $ in the JavaScript examples, and the “#slider2” targeting any HTML element with an ID of slider2
- Next we initialize the slider passing the s2obj object to set the options for the slider
- Next we initialize the Pips plugin with its options
- The the float portion with its options
- The final portion is binding a browser procedure named Slider2Change to the JavaScript event slidechange. Which basically means when the slider changes, the browser procedure Slider2Change will be ran
- Notice we had to wrap on with quotes to avoid intellisense, are you starting to notice a pattern?
- slidechange is the event that fires when you change the valve of the slider. No I wasn’t born with that knowledge inheriently embedded 🙂 I found it on the list of events for the Jquery UI slider, on this page
- The & is just passing in the entire function by reference, please don’t ask me to explain it any better than that 🙂
BTW, you might notice that each one of the . sections of line 24 looks like an individual statement, and in relativity that are. It’s a JQuery technique called chaining, which allows you to perform several commands against the same object, you can read all about it on W3 Schools. See I told you W3 Schools was a source for a wealth of information!
Of course we need to create the Slider2Change browser procedure. Remember anything you write in WL browser code gets converted into JAVAScript, its the only language the browser “speaks” so even though we are written the browser procedure in WL code, it exist as a JavaScript function on the page when its ran.
Here’s the code of our procedure

PROCEDURE Slider2Change(Event <useful>,UI)

edtSlider2 = UI.value
As you can see it isn’t doing anything to complex, it simply get the value of the slider and sets our edit control to that value. In a procedure app where our edit control would be linked to a database field, and we are doing FiletoPage() and PagetoFile() this would get our database updated with the value of the slider.
Your might be wondering about the parameters of the procedure, the on statement we used above binds an JQuery Event to an event listener, which is what our browser procedure is. You might be more familiar with the phrase callback. Event Listeners have 2 standard parameters the Event, and the Element, both of which are objects. The Event would be useful if you are binding the listener to more than one event, and therefore need to know which event fired it, for us we know it is only firing on slidechange so we don’t need to use it. I used the WEBDEV <useful> keyword to avoid a compiler warning about the unused parameter. The Element being passed in is actually the slider, and we know value is one of the properties of the slider, so we are able to get the current value of the slider by simply looking at UI.value. Simple enough right? We will look at some more complex examples later
All the coding is done and if we test the page now we should see our new slider, showing us a selecting between $1 and $10 and set to $5 to start, as we move the slider the edit control value changes as well as showing the selection in a bubble above the handle, due to our float options. Remember that edit control would normally be hidden and off the page, we just want it is for demonstration purposes. Also notice that the edit control only contains the number not the $, that is because the $ is just coming from our prefix option of the pips and float and doesn’t effect the actual value of the slider. In fact the slider value is always a numeric value but don’t worry we will cover how to use it to select text values in another example below.


Example 2, select a year for retirement
In this example, we want to know what year you want to retire. So that would be between the current year and your life expectancy.
So again we start with a new HTML Control (htmlSlider3) and edit control (edtSlider3) that is visible for demonstration purposes but hidden in production. And in our Load event we place an empty DIV like the others
This slider has a bit of a dynamic element to it. Depending on the user’s age, assuming the youngest age using our application would be 20 and the maximum life expectancy of 100, we might have anywhere from 10 to 80 year to select from.
I added some randomness to our init code, to represent likely data elements from a production environment

InitRandom()
MinYear is int = CurrentYear()
LifeExpectancy is int = Random(10,80)
edtSlider3 = CurrentYear() + Random(LifeExpectancy - Round(LifeExpectancy/4),LifeExpectancy)
MaxYear is int = CurrentYear() + LifeExpectancy
The minimum year is the current year. Life expectancy is between 10 and 80 more years. We set the current selected value somewhere in the last 25% of life expectancy, again replicating a production environment where the value would be coming from the database. And the maximum year is current year plus the years of life expectancy, unless of course you are planning to retire after you pass…
No need to tear into that code any further, but it should give us a fairly dynamic slider that changes slightly every time you refresh the page. You might notice that we didn’t use hidden edit controls for MinYear, and MaxYear, that is because we will be able to read their values just fine in our browser code, its when we try to get the value back to the server and link to the database that things get challenging
Now lets look at our code in the LOAD event
htmlSlider3 = [
<div id="slider3" class="slider"></div>
]

s3obj is dynamic object = new "Object"
s3obj.min		= MinYear
s3obj.max		= MaxYear
s3obj."value"	= edtSlider3

s3pobj is dynamic object = new "Object"
s3pobj.rest		= "label"
TotalYear is int = (MaxYear - MinYear ) + 1
SWITCH TotalYear
	CASE <= 10
		s3pobj.step = 1
	CASE <= 20
		s3pobj.step = 2
	CASE <= 30
		s3pobj.step = 3
	CASE <= 40
		s3pobj.step = 4
	OTHER CASE
		s3pobj.step = 5
END


jQuery("#slider3").slider(s3obj).slider("pips",s3pobj).slider("float")."on"("slidechange",&Slider3Change)
- Other than the ID nothing changes in the DIV defined on line 28
- Line 31 is declaring the JavaScript object for our slider options, the only change is the name
- Line 32 and 33 are using MinYear and MaxYear to set the limits of the slider
- Line 34 is setting the current selected value
- Line 36 is declaring the JavaScript object for our Pips options
- Line 37 is saying with want labels for every Pips not just the min and max. But wait ain’t that going to get a bit crowded with 80 years? Read on dear reader, read on…
- Line 39 starts a switch statement, and we set the step value of the Pips between 1 and 5 based on the total number of years displayed.
- Step doesn’t change the selection range, just which labels are displayed, we can still select any year.
- If there are more than 100 pips, a 5% step is automatically applied if you don’t manually set one
- There is also a step option on the slider itself. Don’t get them confused
- If you set the step value on the slider to 2, you would only be able to select every other year
- Setting it on just the Pips, just determines which labels are displayed
- If you have a step defined at both levels, they work together. For example a Slider step of 2 and a Pips step of 3, would be only every other year is selectable, but only every 6th year would have a label.
- Line 53 initializes our slider, pips and float. Notice we didn’t have any float option to specify, but we still want the value to show in the float so we specify the float just without passing an object.
- Of course our browser procedure for the on slidechange is different but the only difference is the edit control updated
Let look a a few examples


Example 3, select a range of years
That’s right we can even select a range, not just a single value. So lets look at selecting a start and end date between the current year, and the life expectancy year of the previous example
So again we start with a new HTML Control (htmlSlider4) . However we need two edit controls (edtSlider4Begin, edtSlider4End) that are visible for demonstration purposes but hidden in production. And in our Load event we place an empty DIV like the others
Since we are using the same Min and Max year from the previous example our init code is pretty simple we are just setting our begin and end years to random values to represent existing values from a database.

edtSlider4Begin = CurrentYear() + Random(5)
edtSlider4End = MaxYear - Random(5)
Looking at the code in our LOAD event
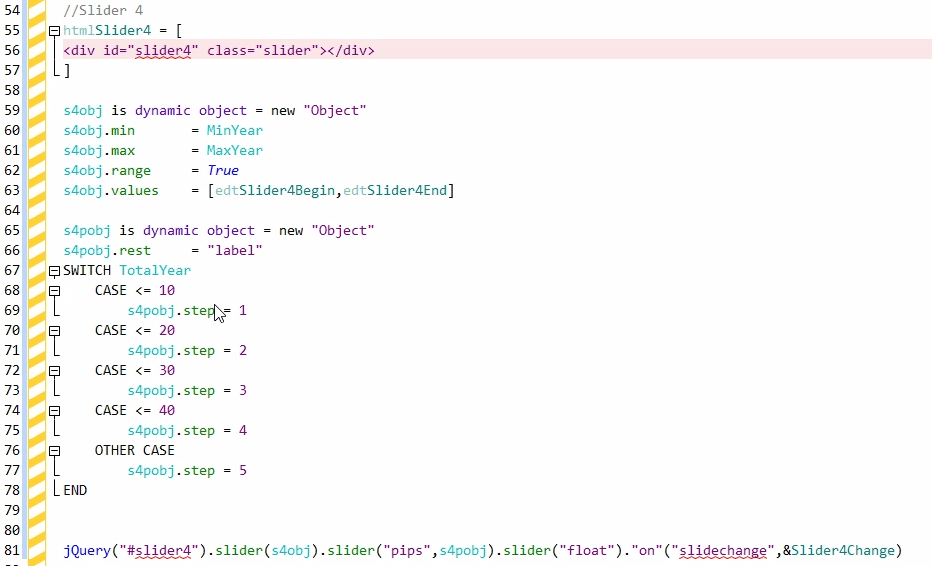
htmlSlider4 = [
<div id="slider4" class="slider"></div>
]

s4obj is dynamic object = new "Object"
s4obj.min		= MinYear
s4obj.max		= MaxYear
s4obj.range     = True
s4obj.values	= [edtSlider4Begin,edtSlider4End]

s4pobj is dynamic object = new "Object"
s4pobj.rest		= "label"
SWITCH TotalYear
	CASE <= 10
		s4pobj.step = 1
	CASE <= 20
		s4pobj.step = 2
	CASE <= 30
		s4pobj.step = 3
	CASE <= 40
		s4pobj.step = 4
	OTHER CASE
		s4pobj.step = 5
END


jQuery("#slider4").slider(s4obj).slider("pips",s4pobj).slider("float")."on"("slidechange",&Slider4Change)- Again line 56 just uses a different ID (slider4)
- Lines 59-61 shouldn’t need any explanation at this point
- Line 62 tells the slider widget that we are doing a range
- Note you can do multiple values with a slider with our without the range option. The range option colors in the slider between the two values.
- Line 63 uses the values option instead of the value option, which accepts an array of values, we are passing in our begin and end values.
- Yes if you were to supply 4 or 5 values you would have a slider with that many handles, I just can’t image the use case for that?
- Nothing new in Lines 65-78 or in Line 81 other than the object and procedure names
There is a change to our browser procedure, instead of looking at the values property we look at the two elements of the values array.

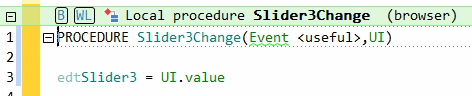
PROCEDURE Slider4Change(Event <useful>,UI)

edtSlider4Begin = UI.values[1]
edtSlider4End = UI.values[2]
And the end result

Example 4, Text Values, select the a month name
So far all of our examples have been integer values, and in fact that is what the slider returns is the numeric value of the selection, but what if we need to select a text value? It is possible we just need to load our text selections into an browser array and then translate between the two.
You guessed it we start with a new HTML Control (htmlSlider5) . However we will use two edit controls (edtSlider5MonthName, edtSlider5MonthNumber) that are visible for demonstration purposes but hidden in production. In production we would likely only have MonthNumber to store, but I wanted to show translating to get the name as well. And in our Load event we place an empty DIV like the others
Our init code is really easy, its just assigning a random value between 1 and 12 to edtSlider5MonthNumber, we will set edtSlider5MonthName in the browser code shortly

// Slider 5
edtSlider5MonthNumber = Random(1,12)
And our code for the LOAD event, at this point in the article you should have a handle on the basics so I am only going to cover the new bits of code

//Slider 5
htmlSlider5 = [
<div id="slider5" class="slider"></div>
]

Months	is array of strings	= ["Jan", "Feb", "Mar", "Apr", "May", "Jun", "Jul", "Aug", "Sep", "Oct", "Nov", "Dec"]
s5obj	is dynamic object	= new "Object"
s5obj.min			= 0
s5obj.max			= ArrayCount(Months) - 1
s5obj."value"			= Val(edtSlider5MonthNumber) - 1
edtSlider5MonthName	= Months[edtSlider5MonthNumber]

s5pobj is dynamic object = new "Object"
s5pobj.rest		= "label"
s5pobj.labels = Months

s5fobj is dynamic object = new "Object"
s5fobj.labels = Months

jQuery("#slider5").slider(s5obj).slider("pips",s5pobj).slider("float",s5fobj)."on"("slidechange",&Slider5Change)- Line 88 creates a browser array with the month names
- Line 90 and 91 require a bit of explanation. In WL browser code arrays start with element 1, but in JavaScript they start with element 0, so be crossing between JavaScript libraries and WL browser code we have to keep that in mind, so the min and max values of the slider should actually be 0 and 11, not 1 and 12. Trust me, it makes my head hurt a bit and I have messed it up more than once, but you’ll get the hang of it
- Line 92, again since the JavaScript array is 0 through 11, we need to subtract 1 from the month number to get the correct element of the array
- Line 97 is new, we pass in our array of month names, which will be used for the labels
- And Line 100 we do the same for float, otherwise we would get 0 – 11 instead of the month name on the float
Our browser procedure we need to do the array calisthenics in the opposite direction by adding one, so that 0 – 11, becomes 1 – 12. And we use the array to set the name as well.
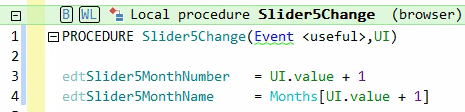
PROCEDURE Slider5Change(Event <useful>,UI)

edtSlider5MonthNumber	= UI.value + 1
edtSlider5MonthName		= Months[UI.value + 1]
And our final result

Final Example, Text values from a database
Month names was a fairly simple example, as we hand coded the browser array and we can count on there not being any new months added to the calendar, but what if the list comes from a database of lookup values? Let’s look at selected from a list of animal names (don’t ask me why, just the first example that came to mind) that is loaded from a database.
Yep we need a new HTML control (htmlSlider6) and an edit Control (slider6)
Our init code is loading a server array with a list of animal names, to simulate a list coming from a database, and setting edtSlider6 to one of the values randomly

// Slider 6
Animals is array of strings = ["Dog","Cat","Chicken","Pig","Cow","Horse","Turkey","Duck"]
edtSlider6 = Animals[Random(1,ArrayCount(Animals))]
And there really isn’t many changes on our LOAD event either
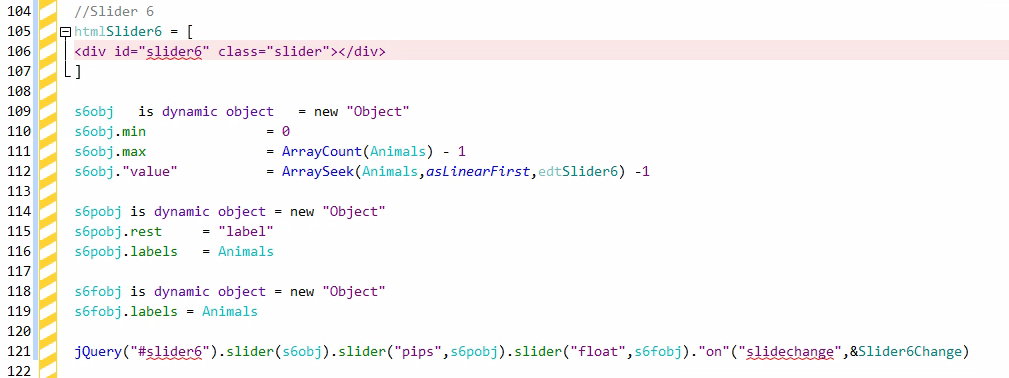
//Slider 6
htmlSlider6 = [
<div id="slider6" class="slider"></div>
]

s6obj	is dynamic object	= new "Object"
s6obj.min				= 0
s6obj.max				= ArrayCount(Animals) - 1
s6obj."value"			= ArraySeek(Animals,asLinearFirst,edtSlider6) -1

s6pobj is dynamic object = new "Object"
s6pobj.rest		= "label"
s6pobj.labels	= Animals

s6fobj is dynamic object = new "Object"
s6fobj.labels = Animals

jQuery("#slider6").slider(s6obj).slider("pips",s6pobj).slider("float",s6fobj)."on"("slidechange",&Slider6Change)- Line 111 using the array count from the server array, yes we can see the server array in our browser code. Remember we are subtracting one since JavaScript arrays start with subscript 0
- Line 112 is looking up the subscript in the array using the text value in our edit control, and then subtracting 1 to get the correct value to set the slider to
- Line 116 and 119 are using the server array to set the label values
Our browser procedure is simply adding one to the slider value to get the correct element from the server array and setting the edit value
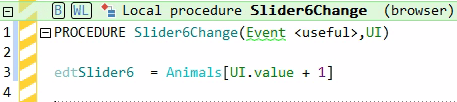
PROCEDURE Slider6Change(Event <useful>,UI)

edtSlider6	= Animals[UI.value + 1]
And our final result

Final thoughts and links to the example project
This just scratches the surface of what can be done with the Jquery UI slider widget and the Pips plugin. One of my favorite production uses is when we used it to select a quarter form a list of dates. If you use in a creative way in one of your projects, please be sure to share your results in the comments

As promised you can grab the example project from my dropbox or you can download it from our public SCM. Info on our public SCM can be found here
